Action
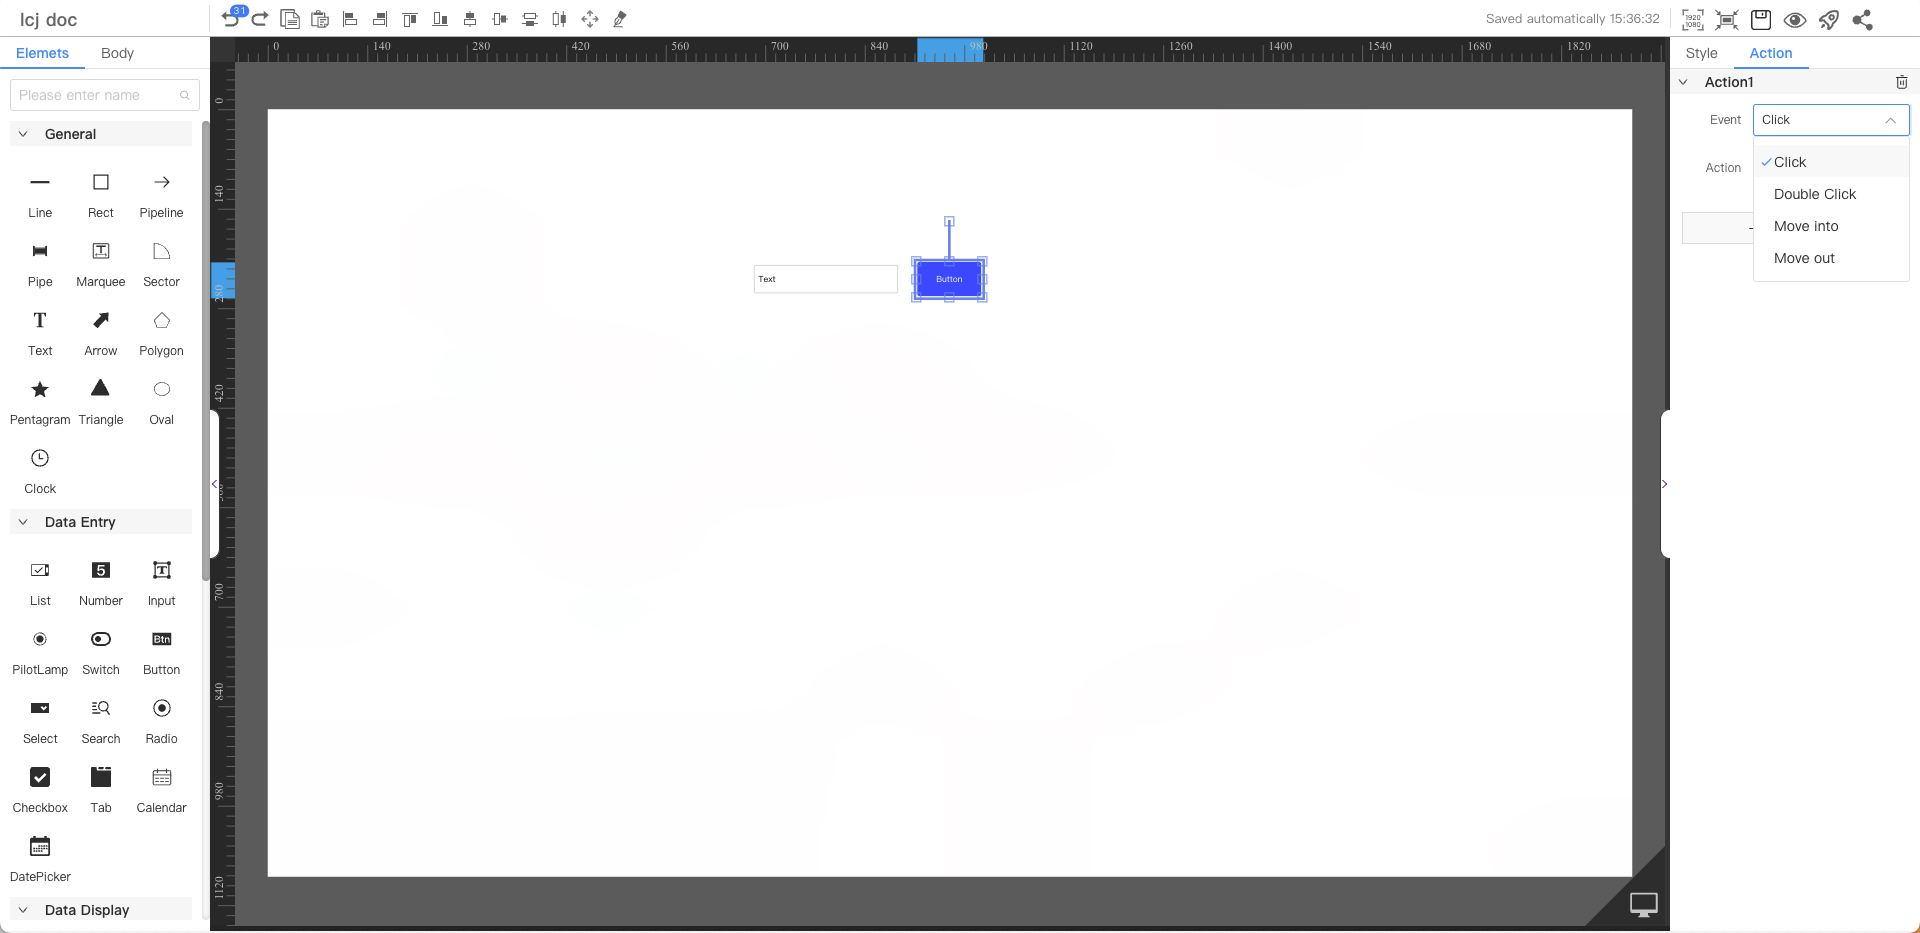
Event: The action that triggers the interaction
- Number, Input, Switch, Select, Search, Radio, Checkbox, Calendar, DatePicker
- Value change: input, select trigger event
- Slider
- Switch Slider: click on the carousel to trigger the event
- Scope: any carousel, a certain carousel
- Switch Slider: click on the carousel to trigger the event
- Tab
- Switch tabs: Click on a tab to trigger an event
- Scope: any tab, a certain tag
- Switch tabs: Click on a tab to trigger an event
- Other Components
- Click: Mouse click triggers the event
- Double Click: Double Click the mouse to trigger the event
- Move into: The mouse moves into the component to trigger the event
- Move out: The event is triggered when the mouse moves out of the component
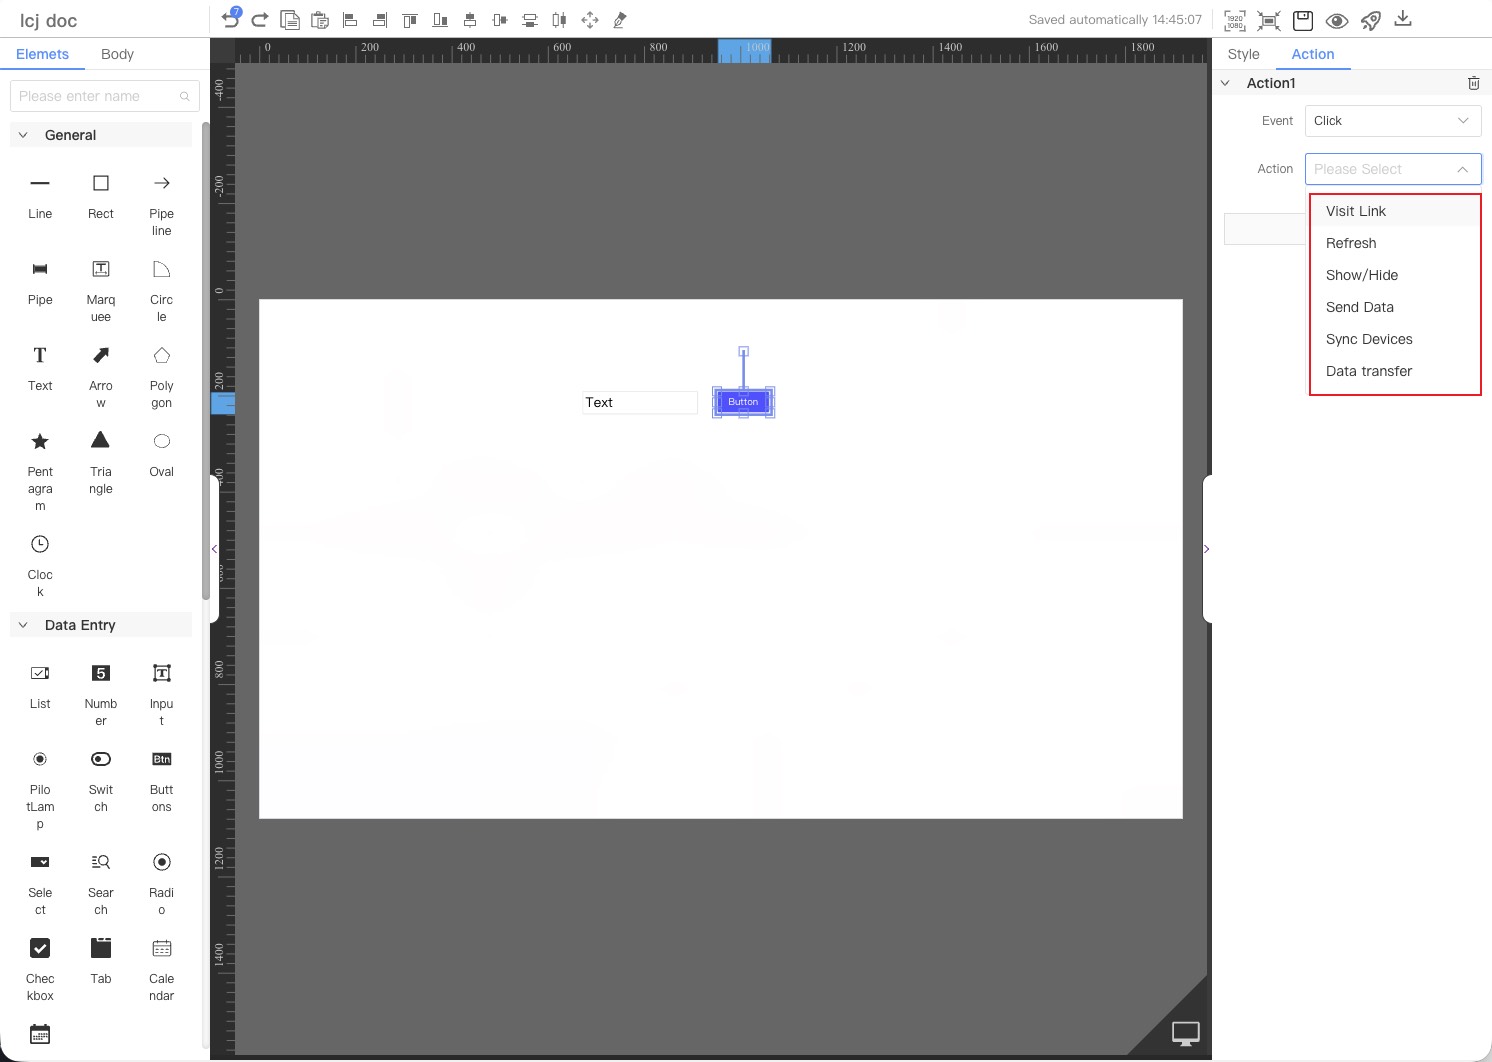
Action: Implement interactive functions
Interaction between page components
- Visit Link
- Refresh
- Show/Hide
- Send Data (will be displayed only if there is a send data component configured on the canvas)
- Sync Devices
- Data Transfer
Visit Link
The main function is to open a new page. The application scenarios are:
- Customize the path of the jump page (for example: jump to a certain page and bring in a parameter as the value of a component)
The following image is set to: Jump to a certain web page, and the parameter name is data, and the value is the input value of the number

-
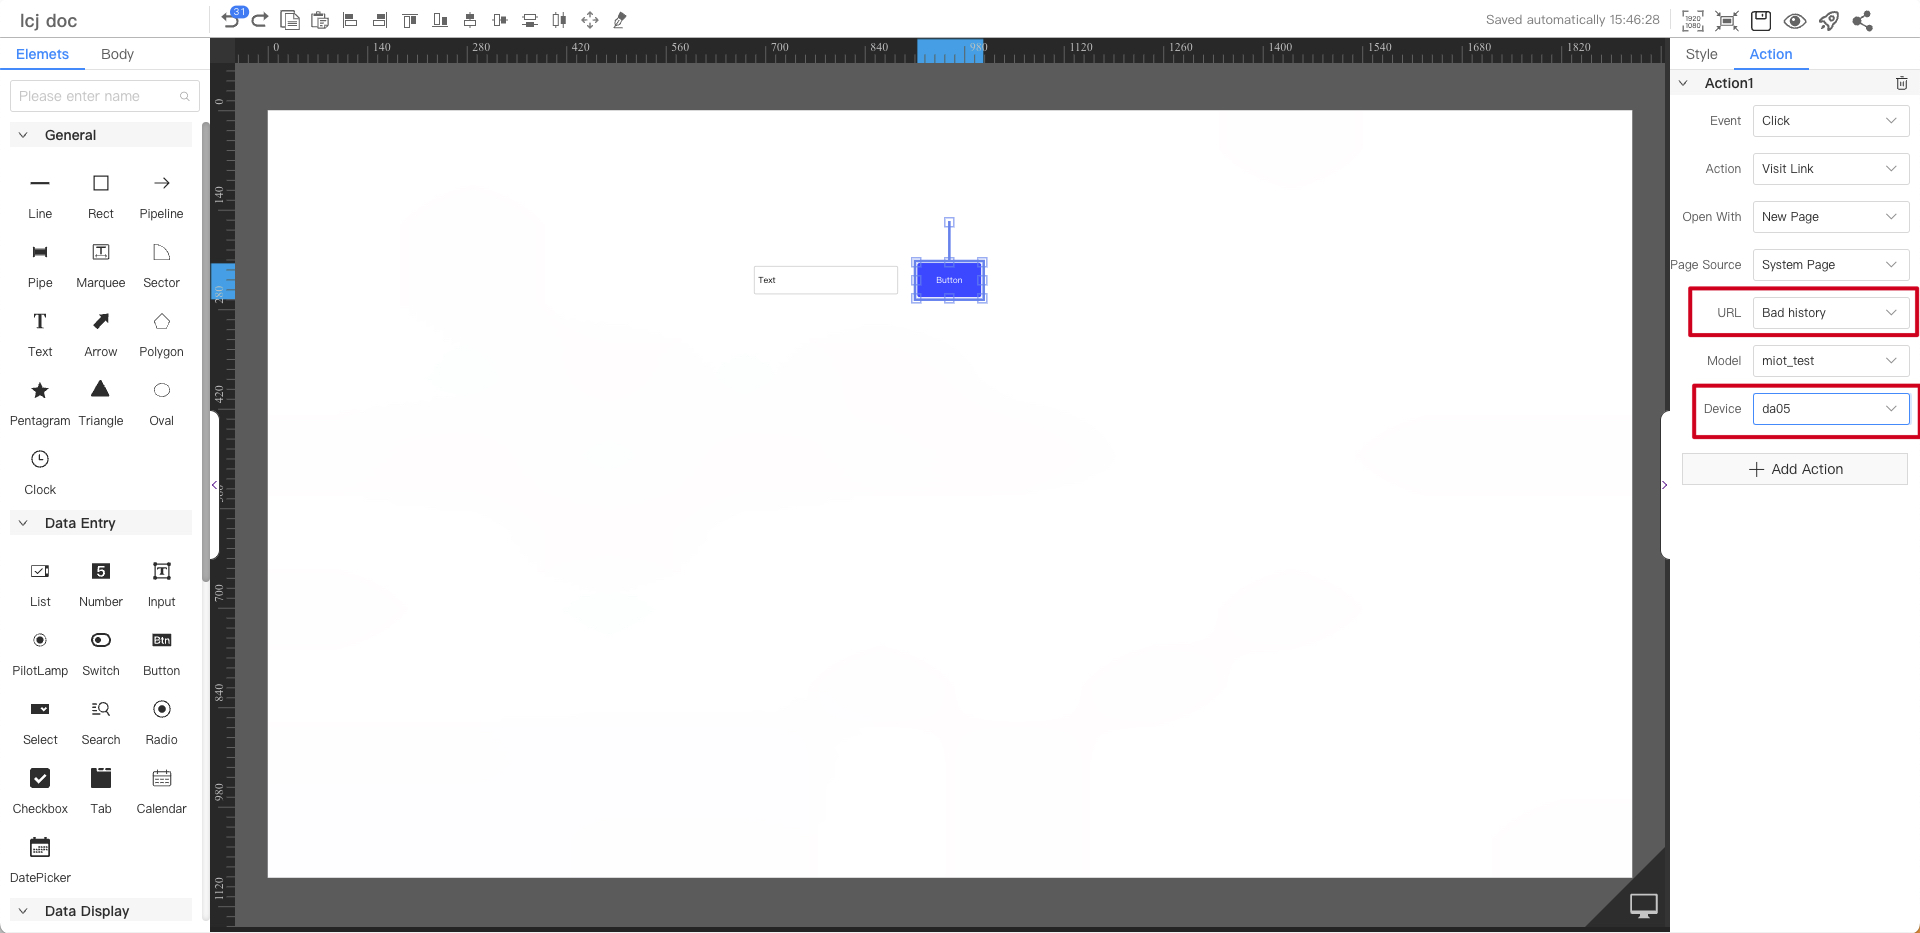
Jump to the system page (for example: if a device get fault, click it to jump to the device fault history page, or if you want to view the device history data, click it to jump to the device history page (historical data) of the device.
- The device page jumps to the system page of current device (fault history, device history)
- The dashboard page needs to configure the model and device under the current board page organization, and then select the system page to jump to (fault history, device history)
-
Jump to the data app page (for example, pages within the system can jump to each other)
- Device page jumps to device page (jumps to other published device pages under the current device page model)
- Jump from the board page to the device page (you need to configure the model and device first, then select the device page)
- Jump from device page or board page to board page (jump to the board page published under the current organization)
-
Parameter configuration
- Parameter value source
- Fixed value: Input content
- Url: The value of the parameter on the url
- Component: The value of the selected component on the canvas
- Charts: Only Bar, Mix, Line, Multiple, Pie are displayed
- Pie:Dimension (click the name of the pie slice), Value (click the value of the pie slice)
- Others:x-axis (x value of clicked bar or line), y-axis (y-axis name of current chart), value (y value of clicked bar or line)
- Parameter value source
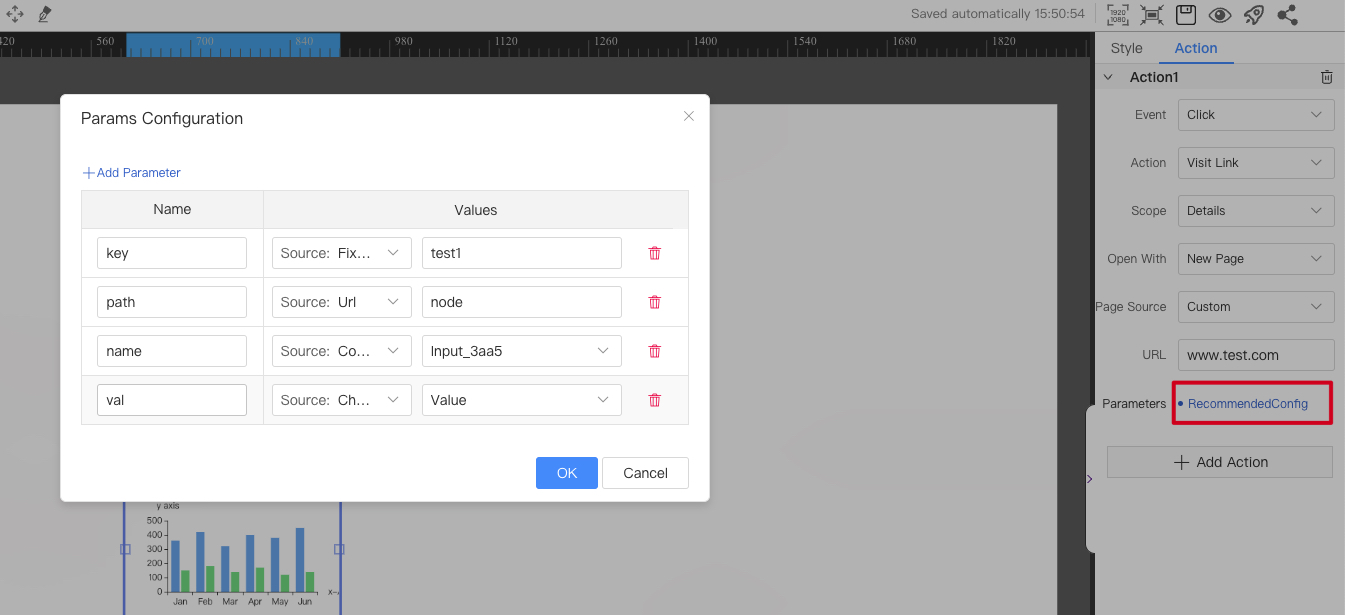
The following image is set to: Jump to the device page link named "cooking machine"

The following figure shows the page you will be redirected to when you click on the
Device Pageabove.

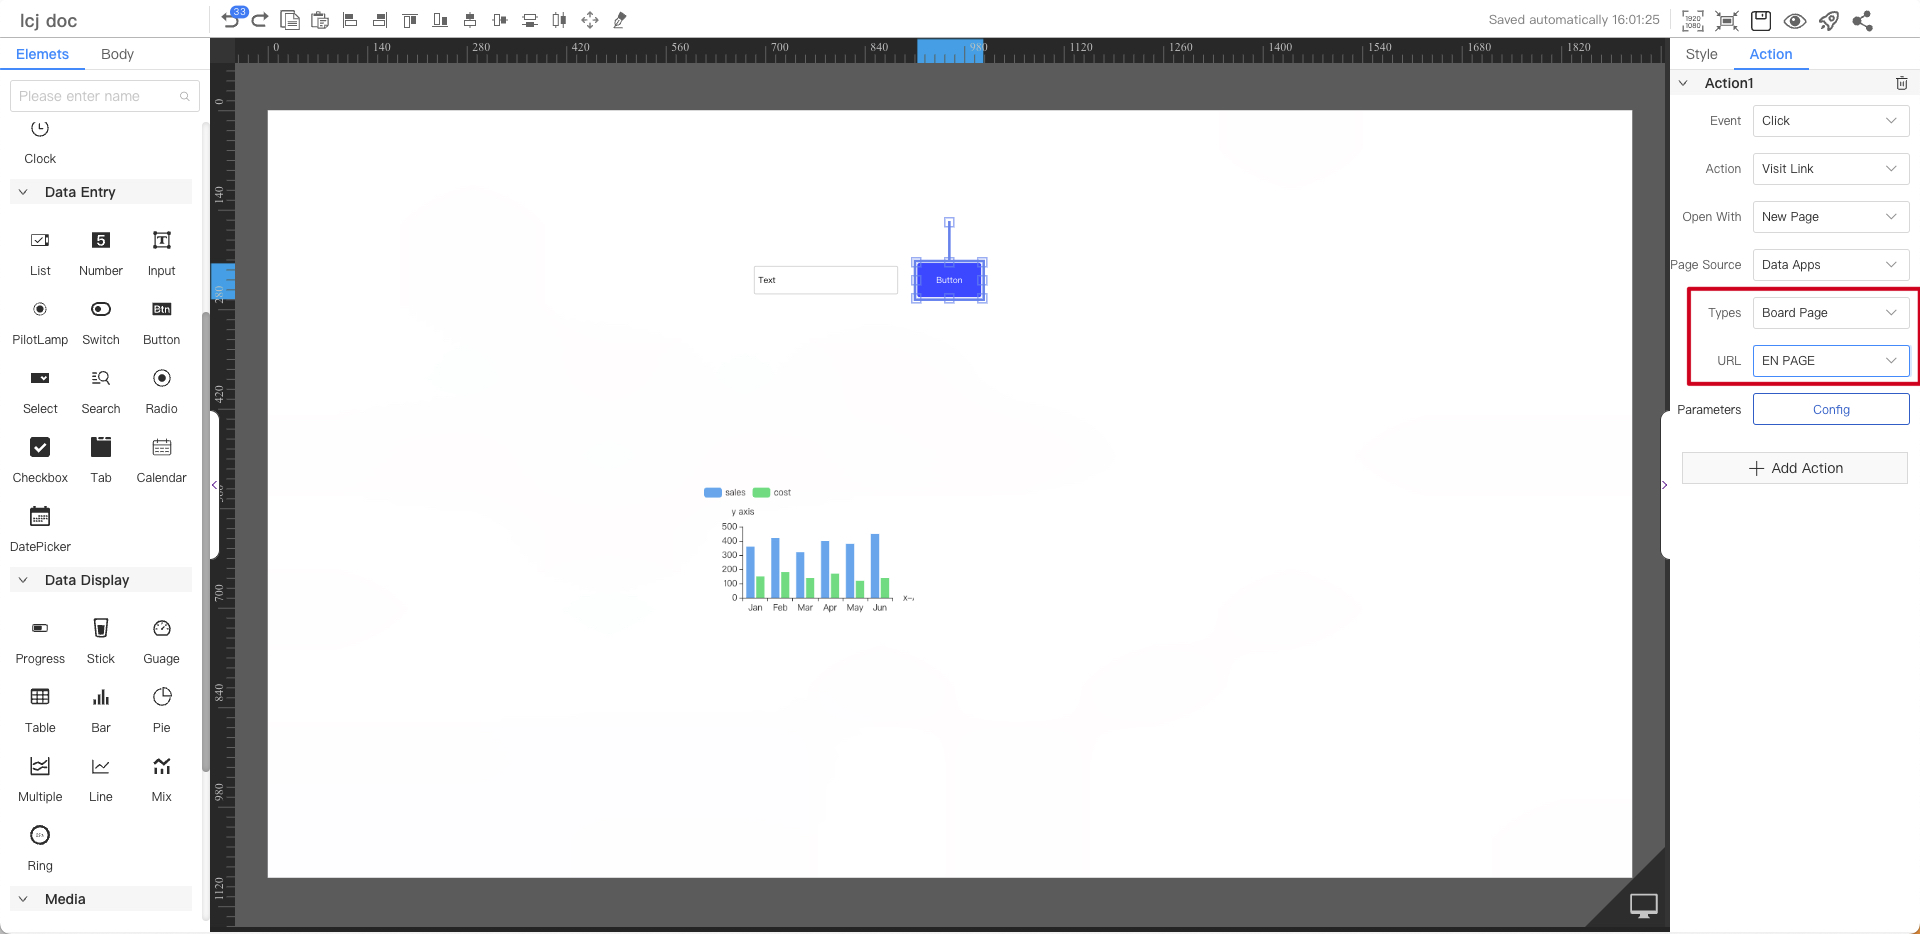
- Board page
The following image is set to: Jump to the page named "Device Monitoring Dashboard" in the board
Refresh Component
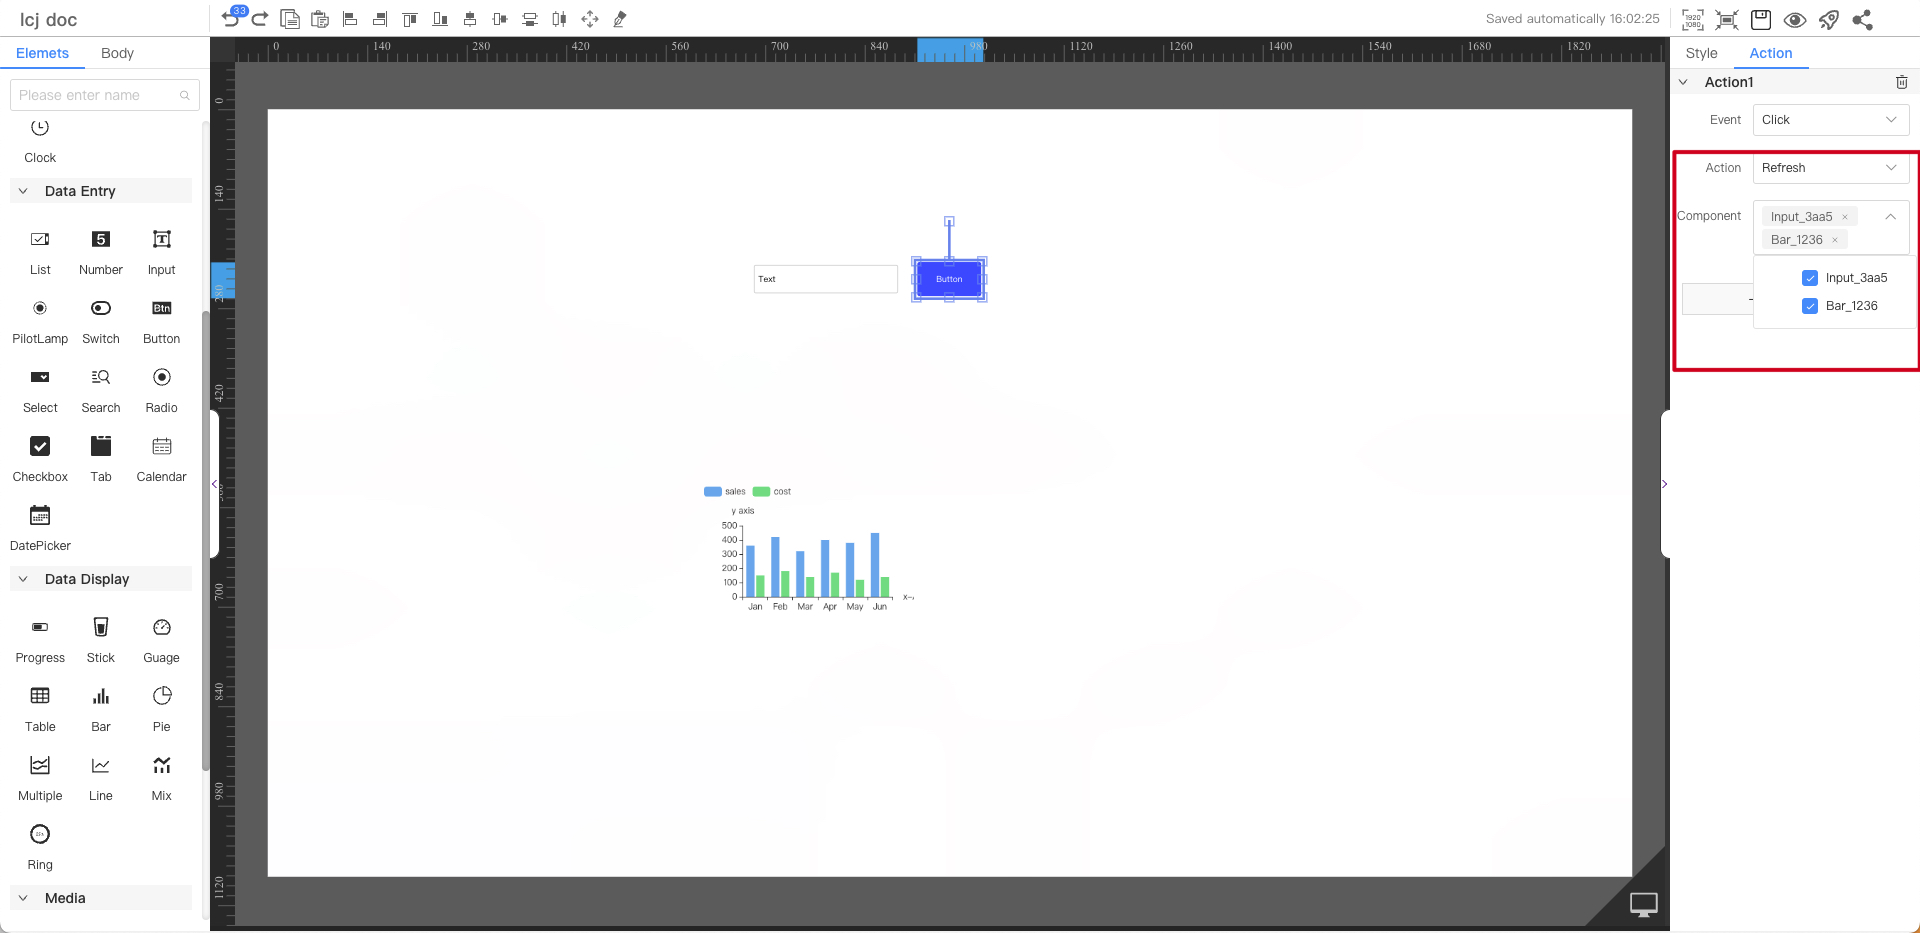
The main function is to refresh the selected component data after the event is triggered
The following picture is set as follows: After clicking the button, refresh the data in the number and input
Show and Hide
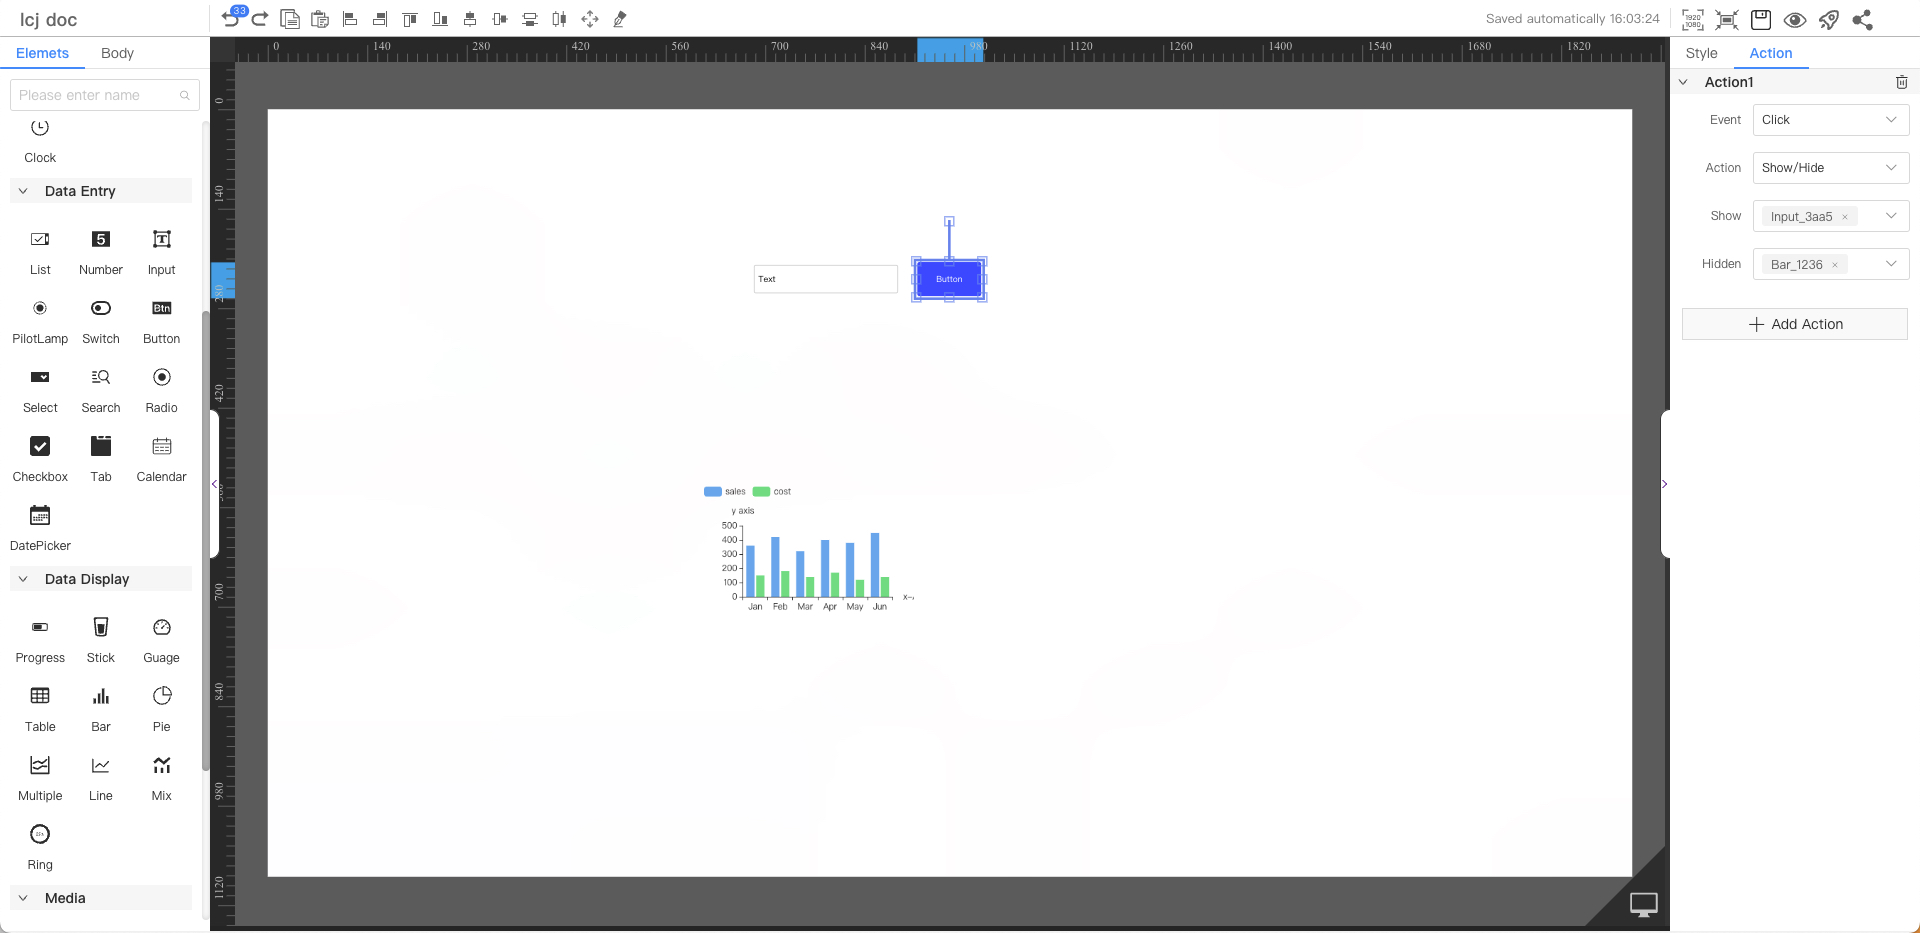
The main function is to hide or show the selected component after the event is triggered.
The following image is set as: After clicking the button, the component number is hidden
Send Data
Send data the device parameter after the primary function is triggered.Click to view send data case

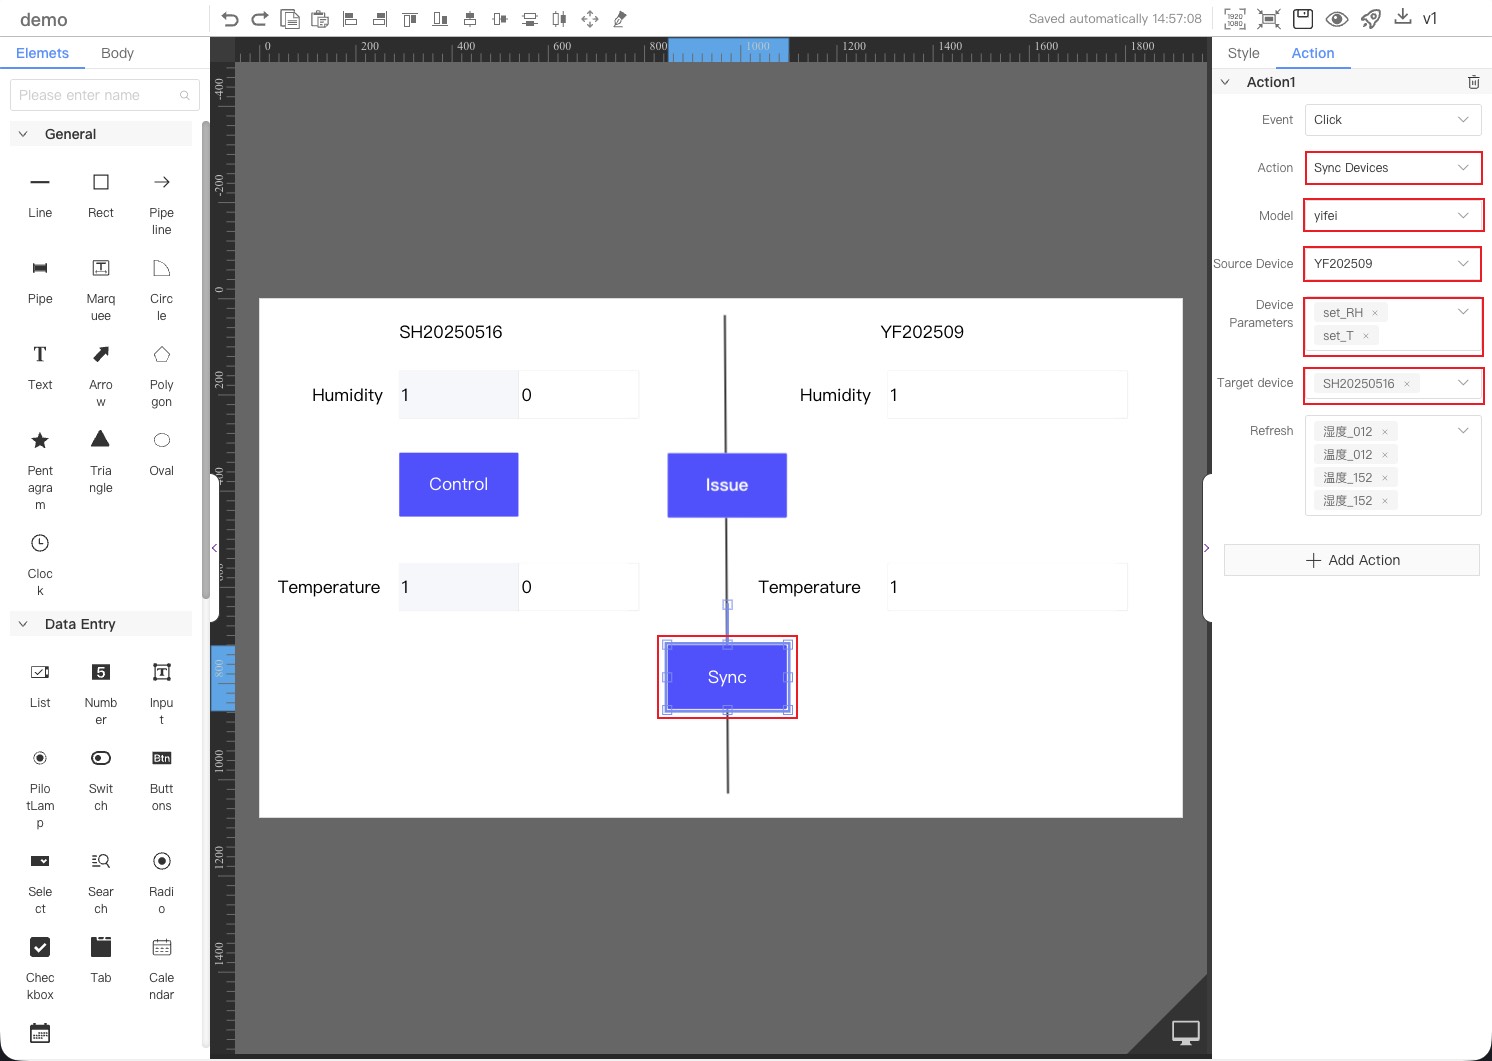
Sync Devices
Synchronization devices are used for data synchronization between devices under the same object model, and their parameters are derived from the object model.
This feature only applies to thebuttonandswitchcomponents; other components are not currently supported.
Click to view sync devices case
Data Transfer
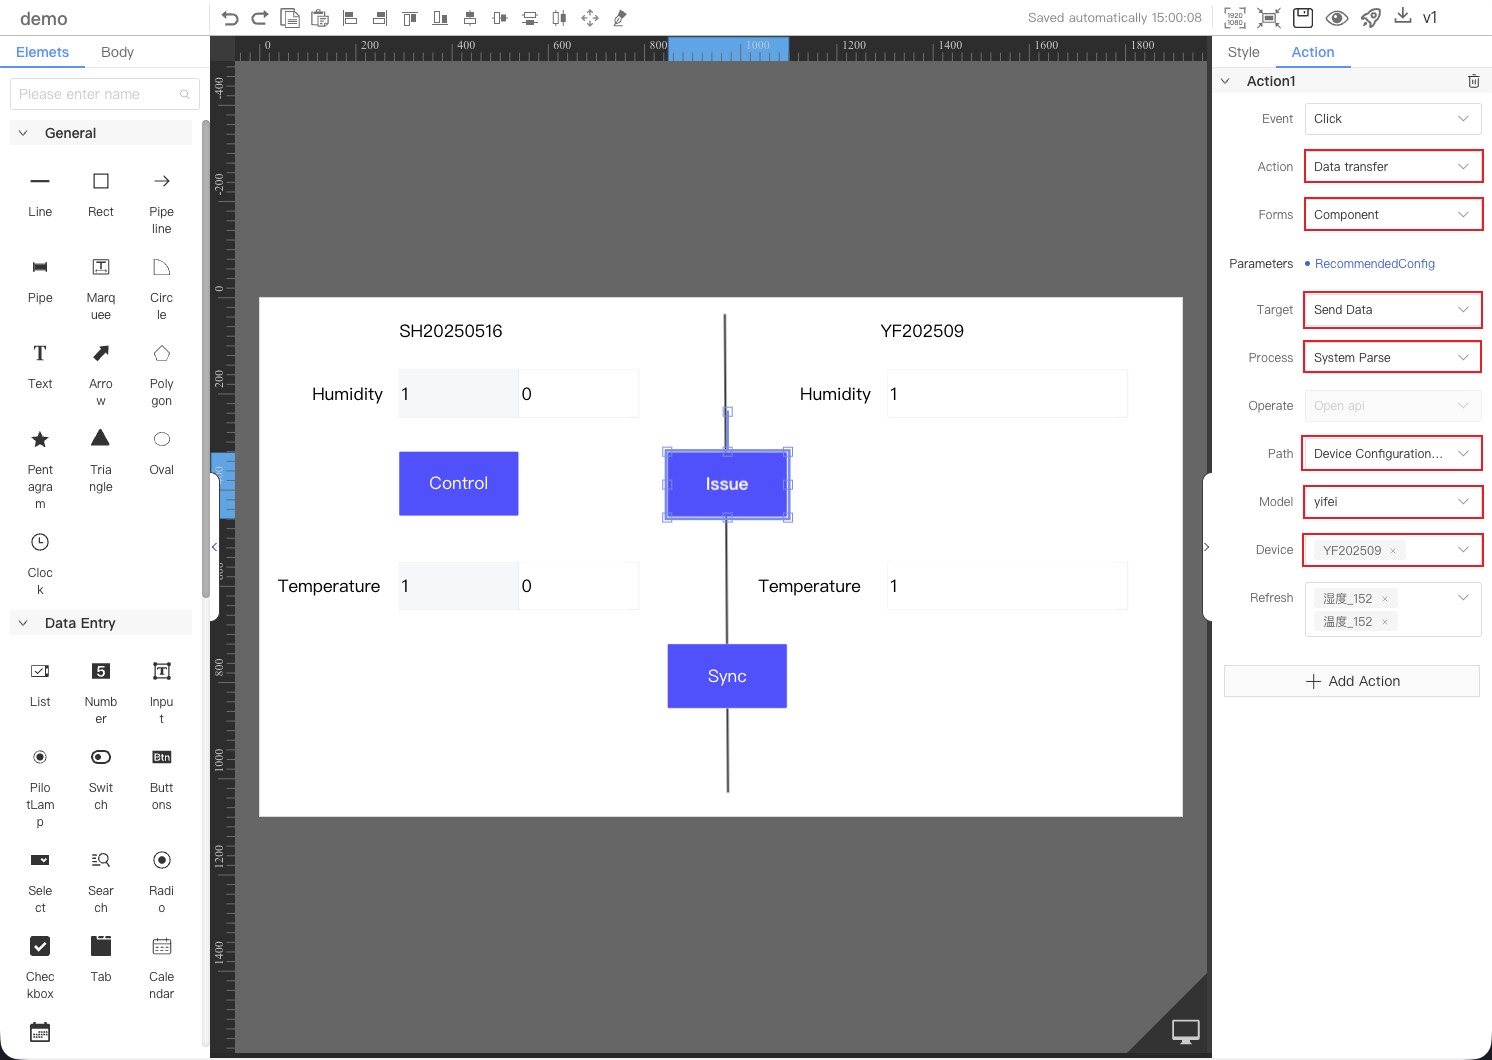
Data transfer mainly includes functions such as device sending parameters from excel files, device sending parameters from external interfaces, device sending parameters from components, file stream download, static file download, data acquisition and processing. This function is only applicable to the two components of
buttonandswitch, and other components are not supported yet.
This feature only applies to thebuttonandswitchcomponents; other components are not currently supported.
Necessary Presettings: In the model application, specify the object model to add Application Integration
See Data Transfer Case
