Use DTP's MQTT Plugin to Connect
Use the MIOT function in Kinco DToolsPro software to connect to the M-IoT platform
Premise
- The user must have at least one Kinco
F2/G2/GL2series screen, and the screen must be connected to the Internet (Ethernet / WiFi / 4G network).The HMI model selected in this case is G2070E; - The user's computer has installed the software
Kinco DToolsPro V1.9.0or above, and can use it normally; - The user already has an account with management rights for the
Kinco M-IoTplatform.
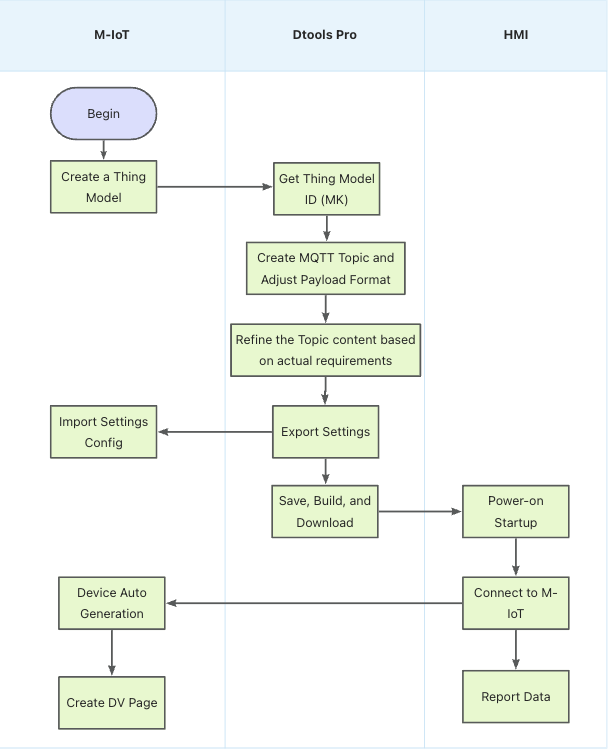
Config Flowchart
Steps
1. Create model
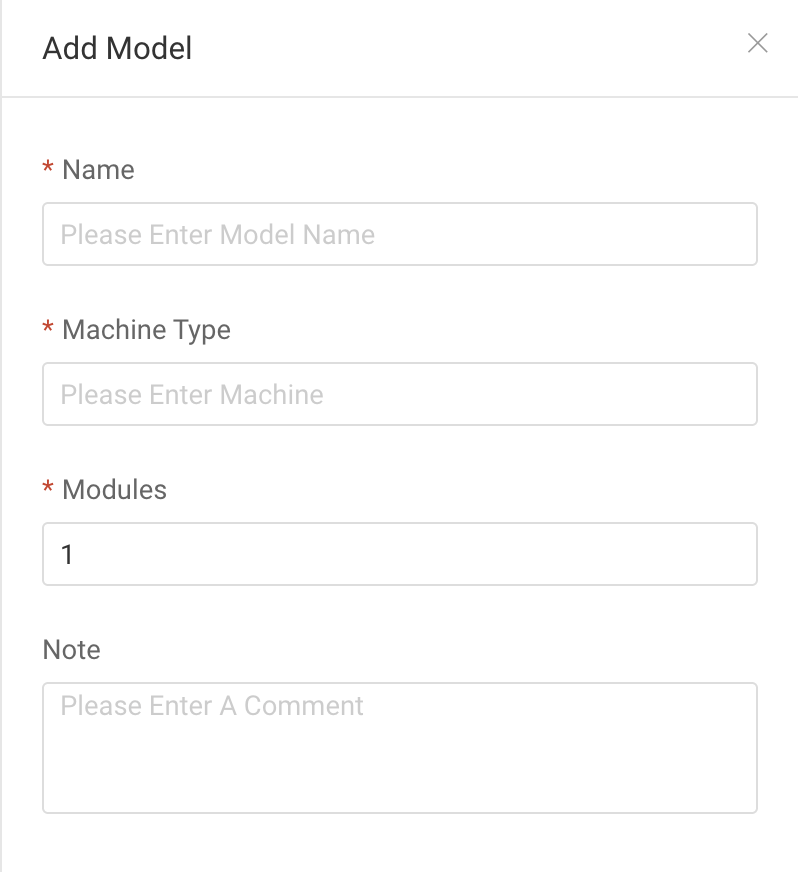
- Name, model��:refers to device related information
- Number of modules:Here it refers to the number of acquisition terminals of a device.Generally, it is
1
2. Dtools Pro opens the MIOT module
Currently using standard MQTT functionality to connect to the M-IoT platform
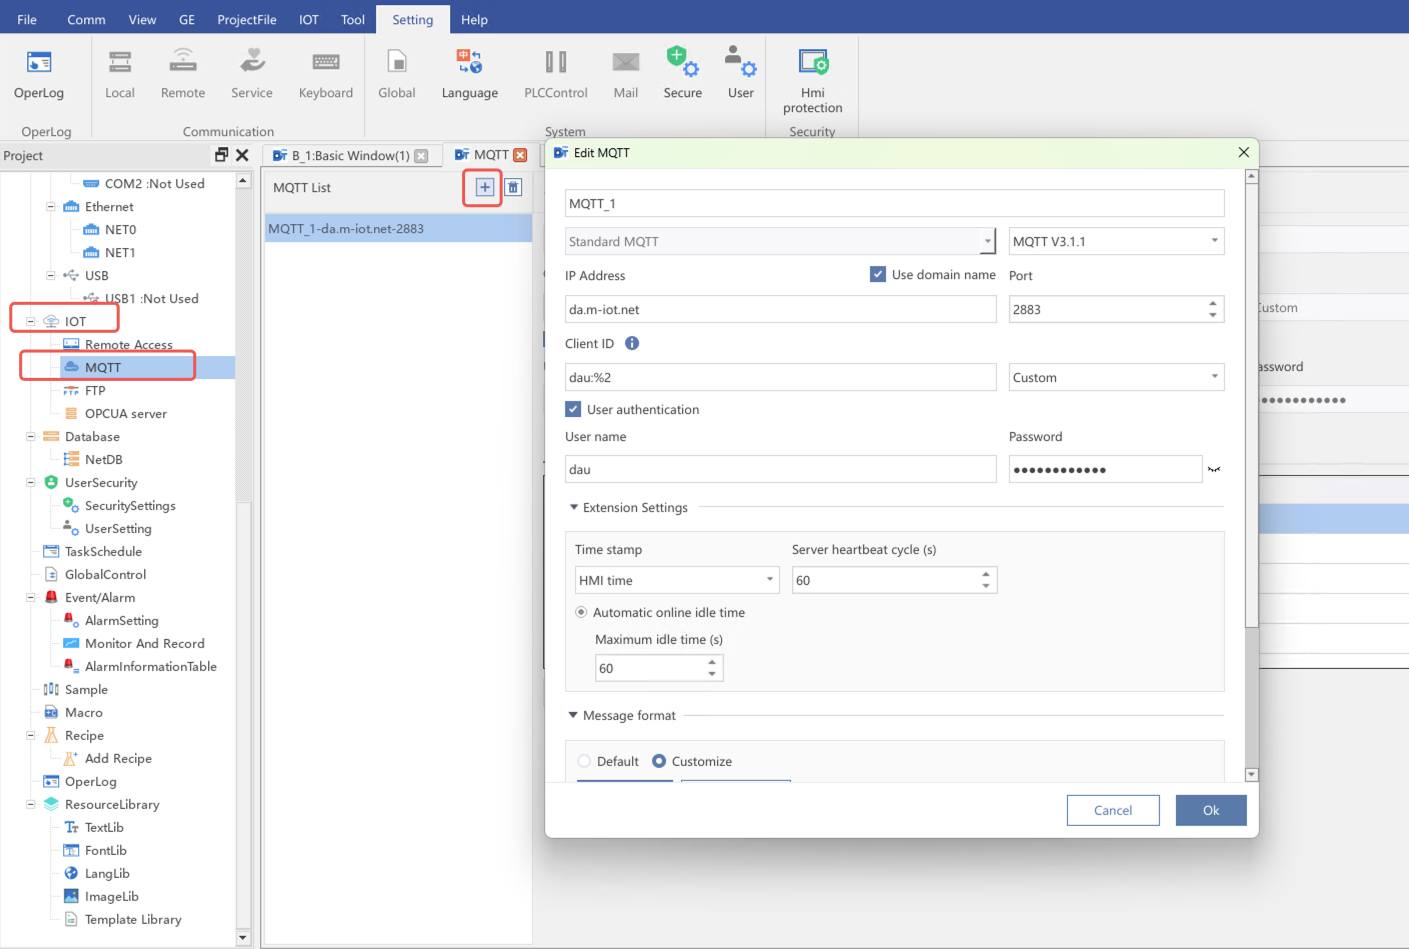
3. Set MQTT connection information

- Basic information (MQTT connection information of the cloud platform)
- MQTT client version: MQTT V3.1.1
- Connection address: da.m-iot.net
- Connection port: 2883
- Client ID: dau:%2
- Username: dau
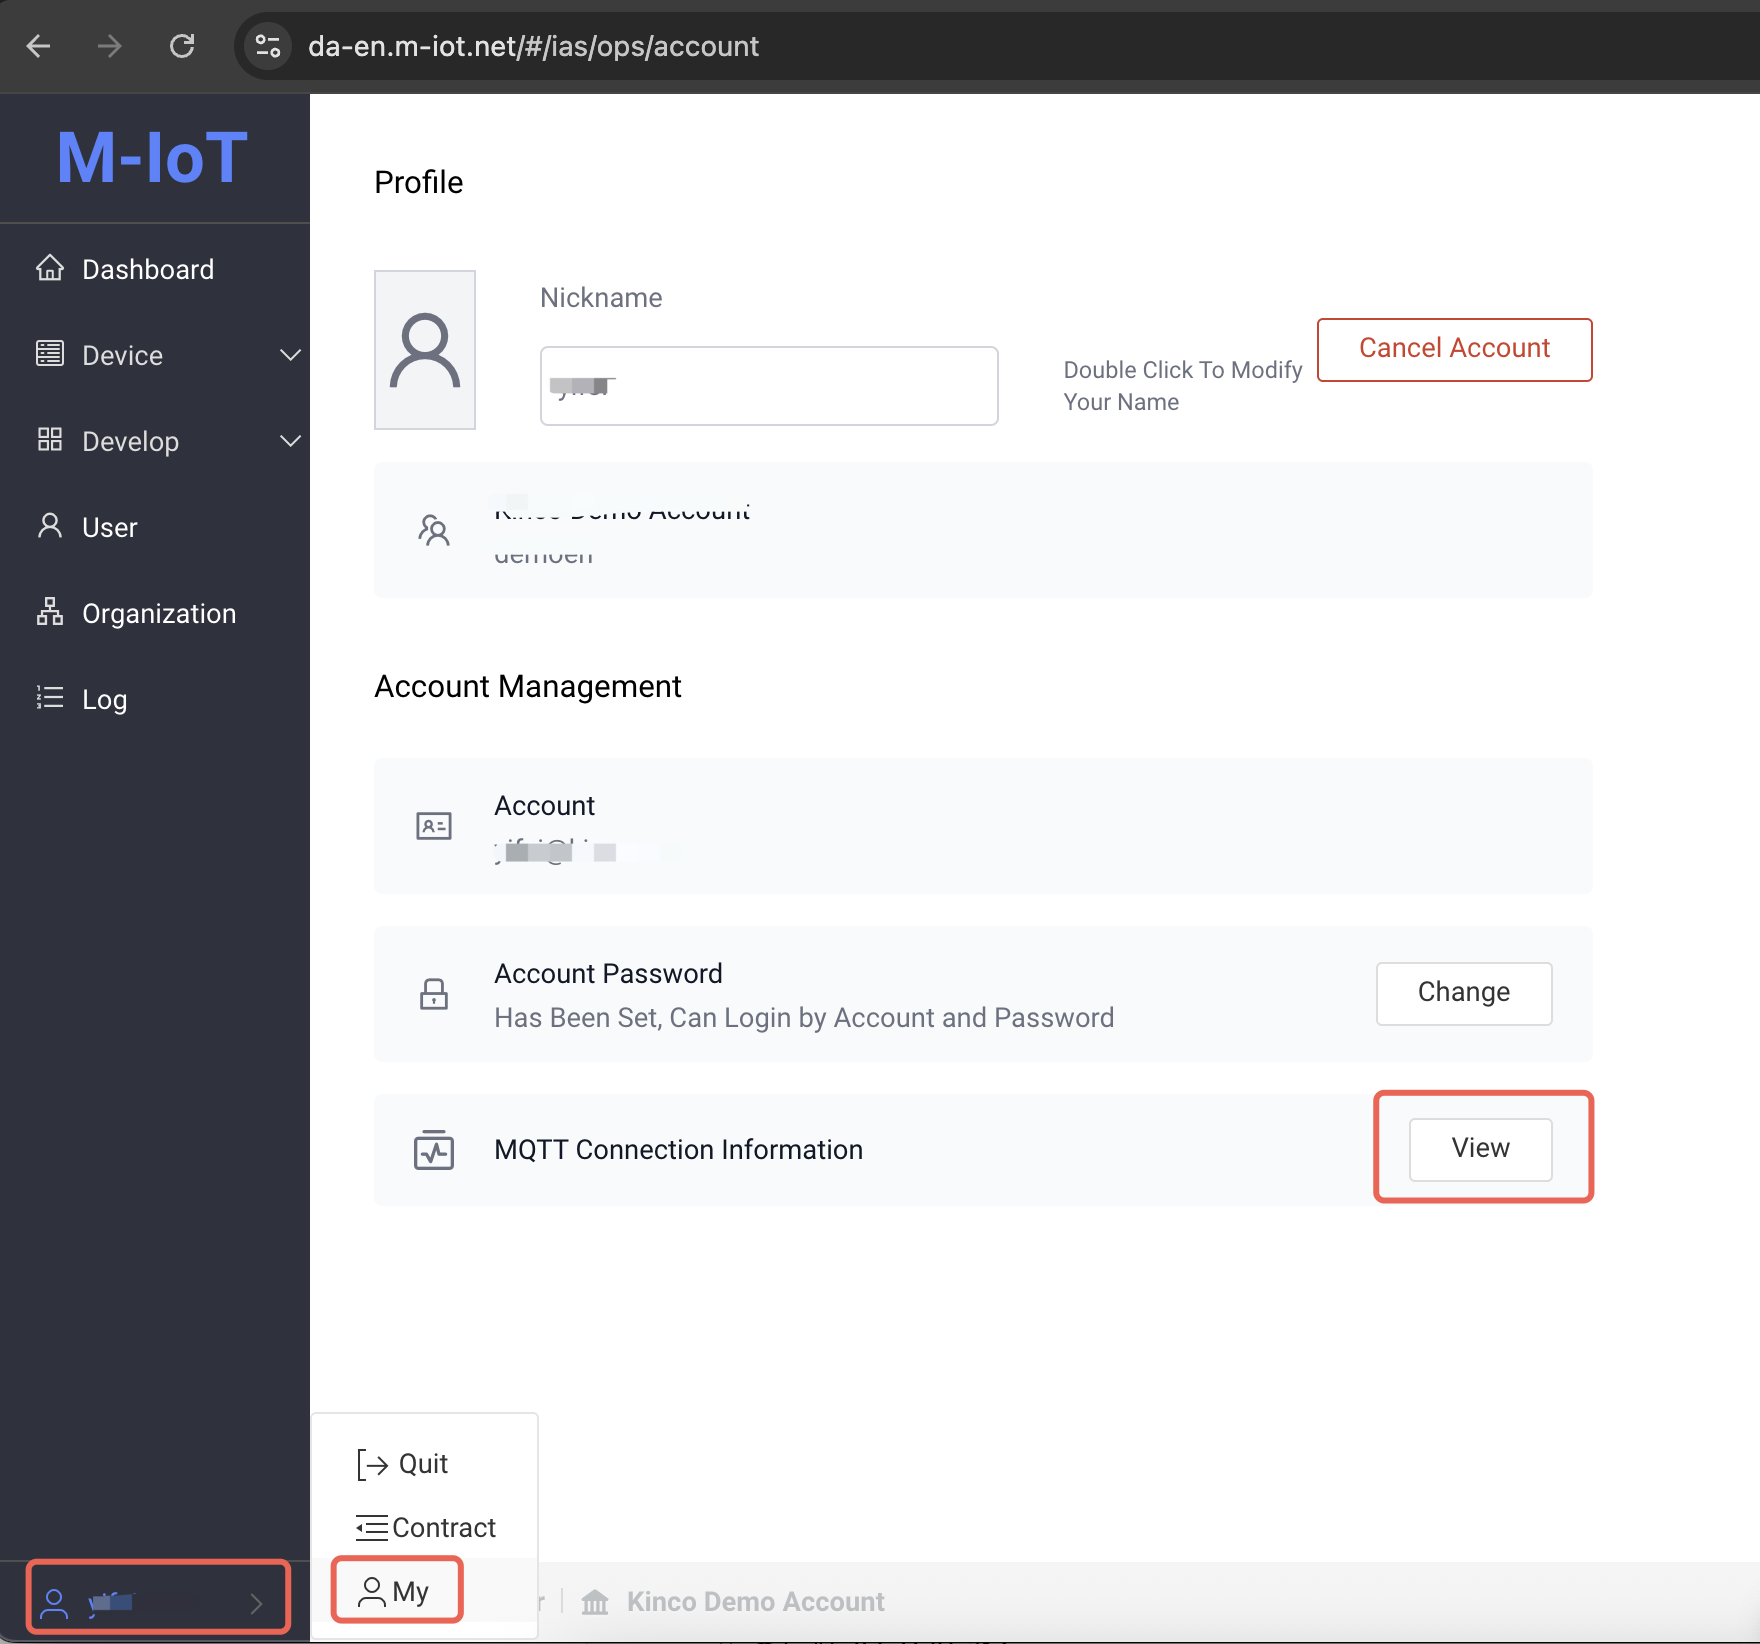
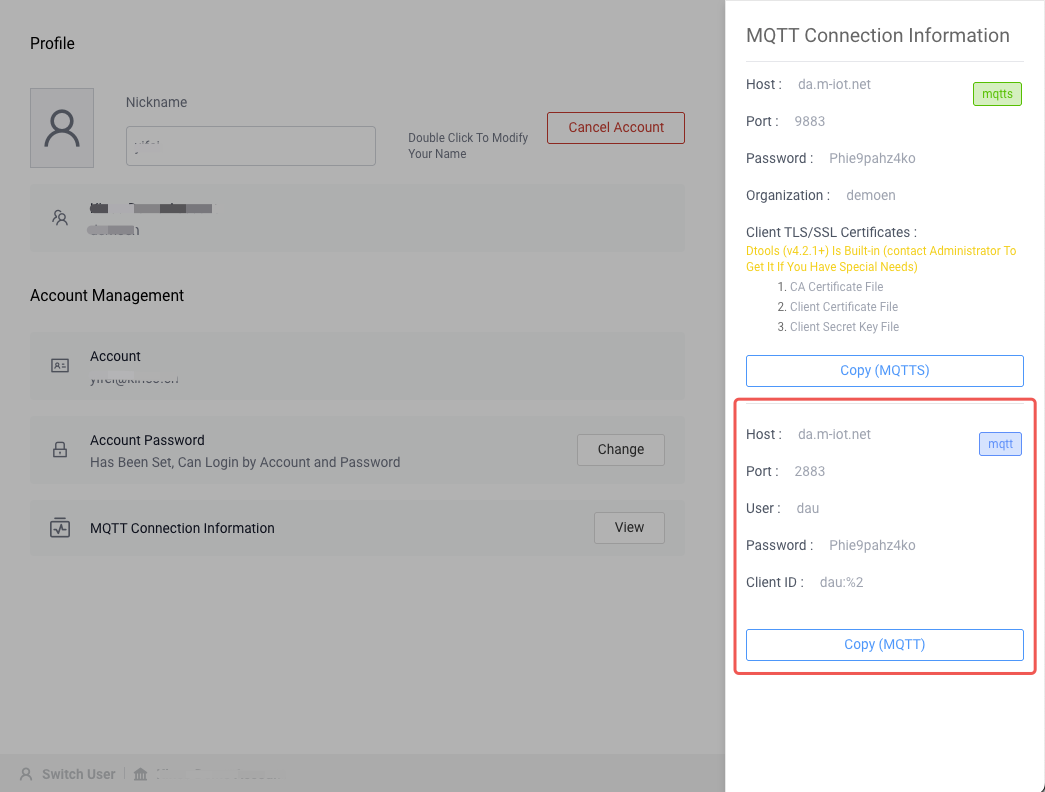
- Password: Check the MQTT connection information in the cloud platform personal information
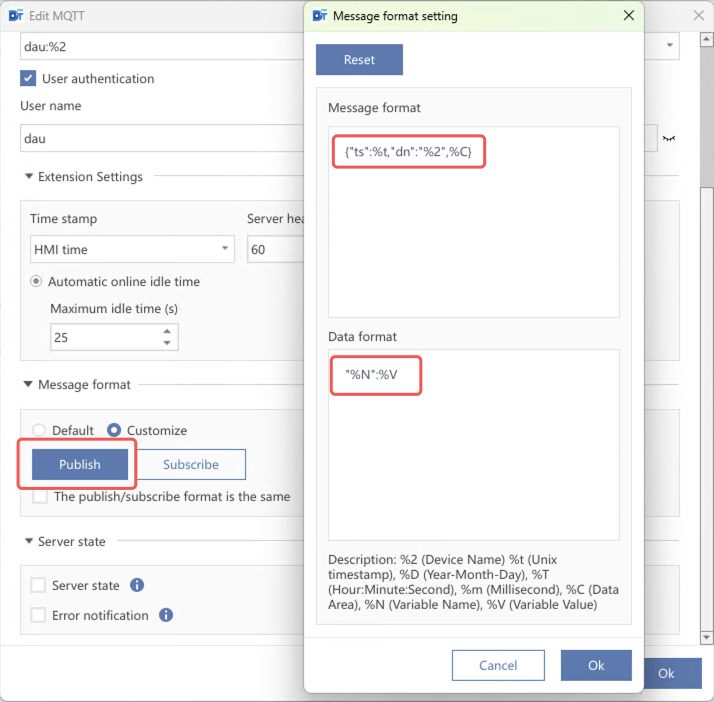
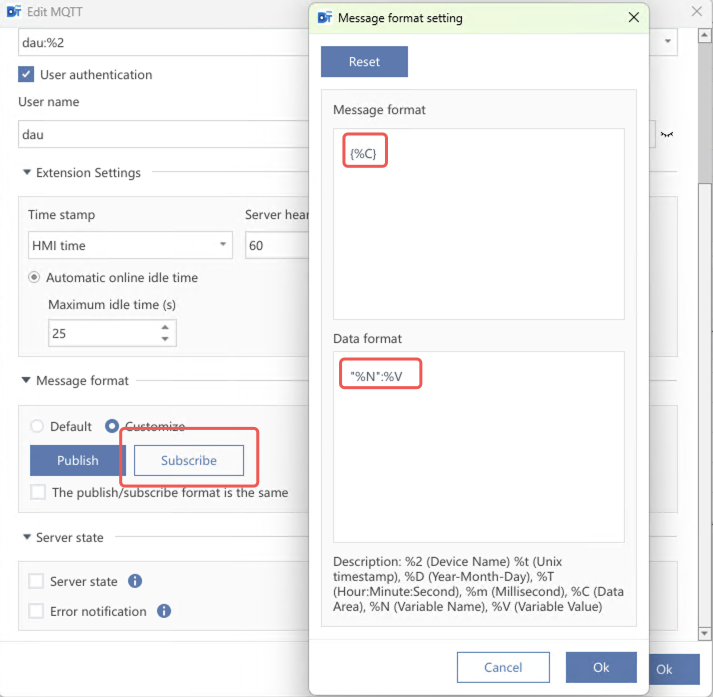
- Message Format
- Publish
- Message format:
{"ts":%t,"dn":"%2",%C} - Data format:
"%N":%V
- Message format:
- Subscription
- Message format:
{%C} - Data format:
"%N":%V
- Message format:
- Publish
4. Device registration
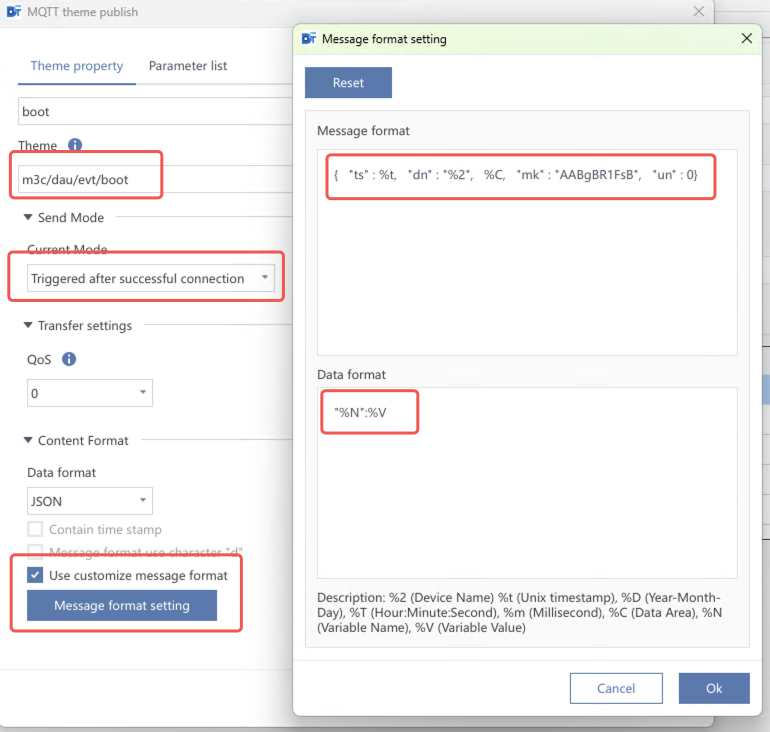
- Topic Properties
- Topic:
m3c/dau/evt/boot - Send mode: Triggered after successful connection
- Content format: Custom message format
- Message format:
{"ts":%t,"dn":"%2",%C,"mk":"model key","un":0}- mk: the model ID you created
- Data format:
"%N":%V
- Message format:
- Topic:
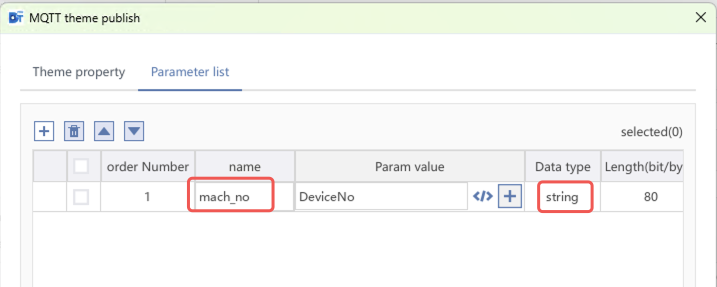
- parameter list
- Device Name: The device name in the platform (If the content is empty, the platform will not register this device)
- Name:
mach_no - Data Type: String
- Name:
- Device Name: The device name in the platform (If the content is empty, the platform will not register this device)
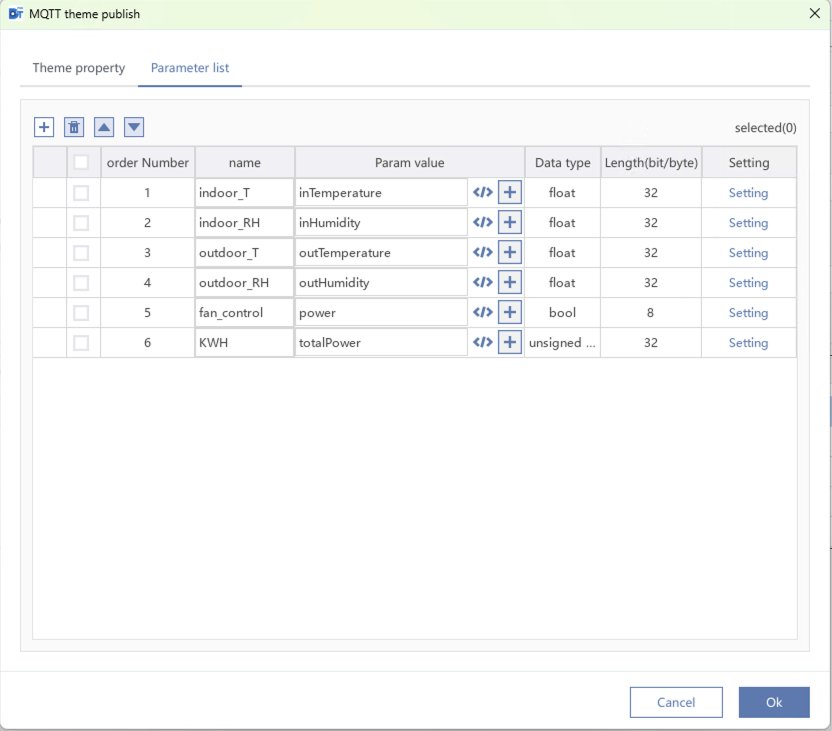
5. Device control parameter report
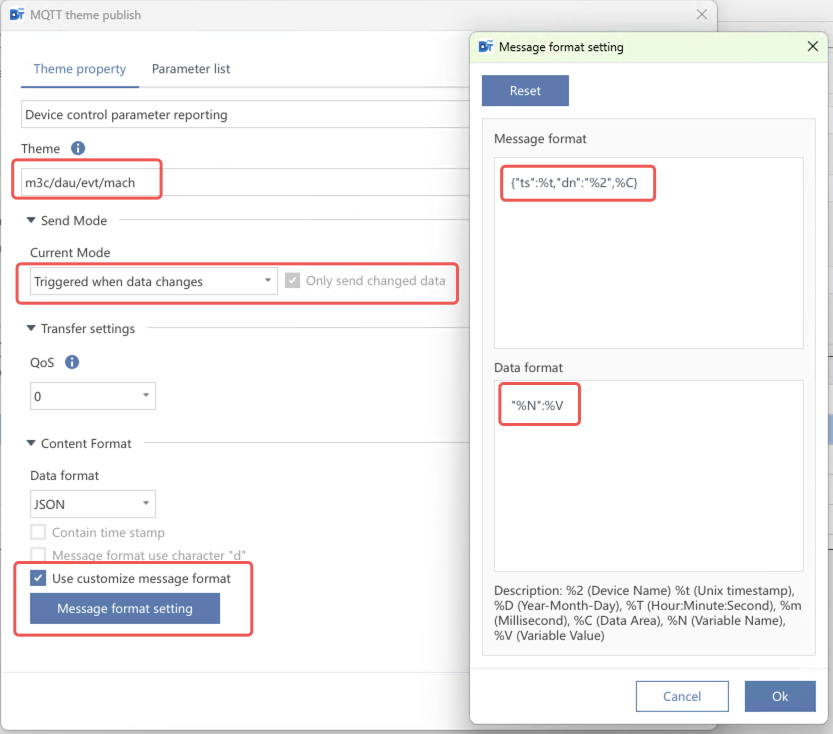
- Topic Properties
- Topic:
m3c/dau/evt/mach - Send mode: Triggered when data changes
- Content format: Custom message format
- Message format:
{"ts":%t,"dn":"%2",%C} - Data format:
"%N":%V
- Message format:
- Topic:
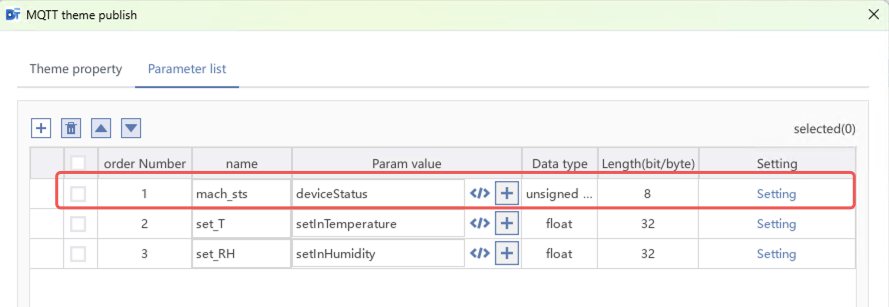
- parameter list
- Device Running Status: Device Run Status
- Name:
mach_sts - Data type: 8-bit unsigned number
- Must exist, platform defined content (0:standby; 1:running; 2:fault;)
- Name:
- Device Running Status: Device Run Status
6. Timed data reporting
There is currently no direct setting for scheduled sending (related sending modes will be added later). The timing function can be achieved by adding
memory variablesandglobal control
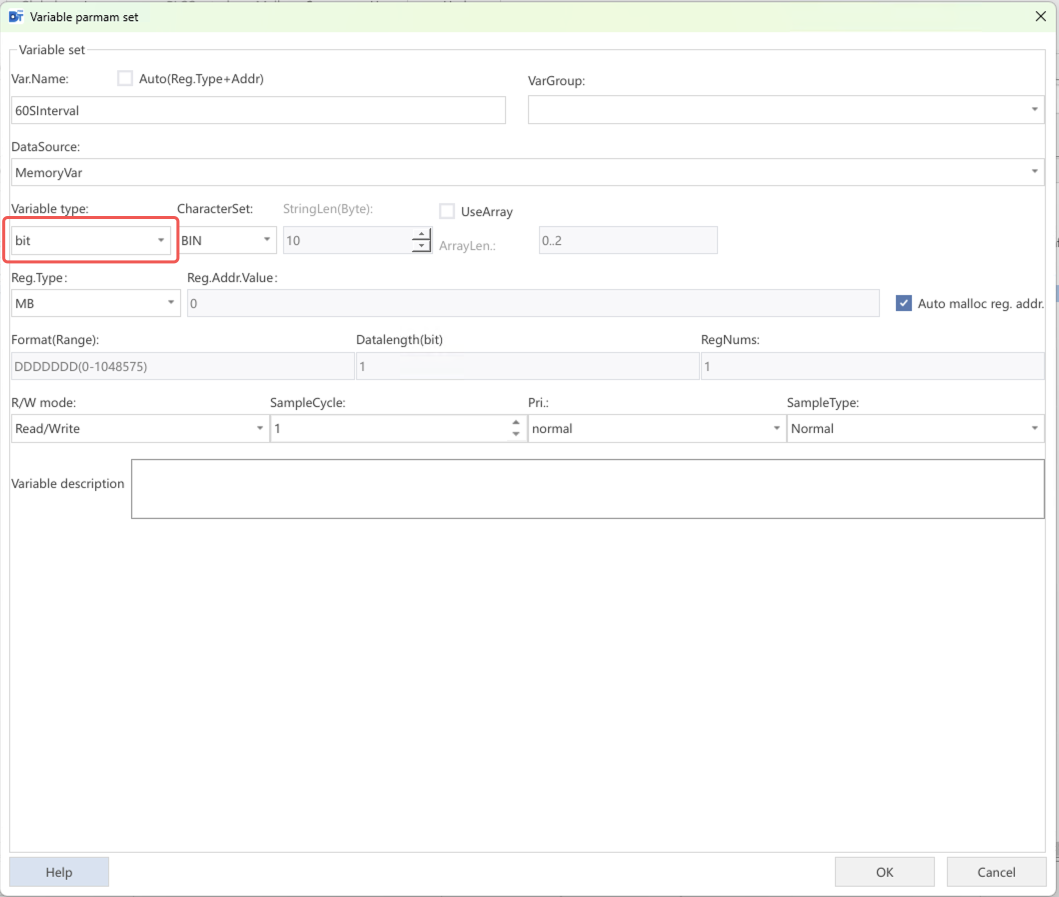
-
Create a new
memory variablewith data typebit.As a trigger for timed reporting -
In
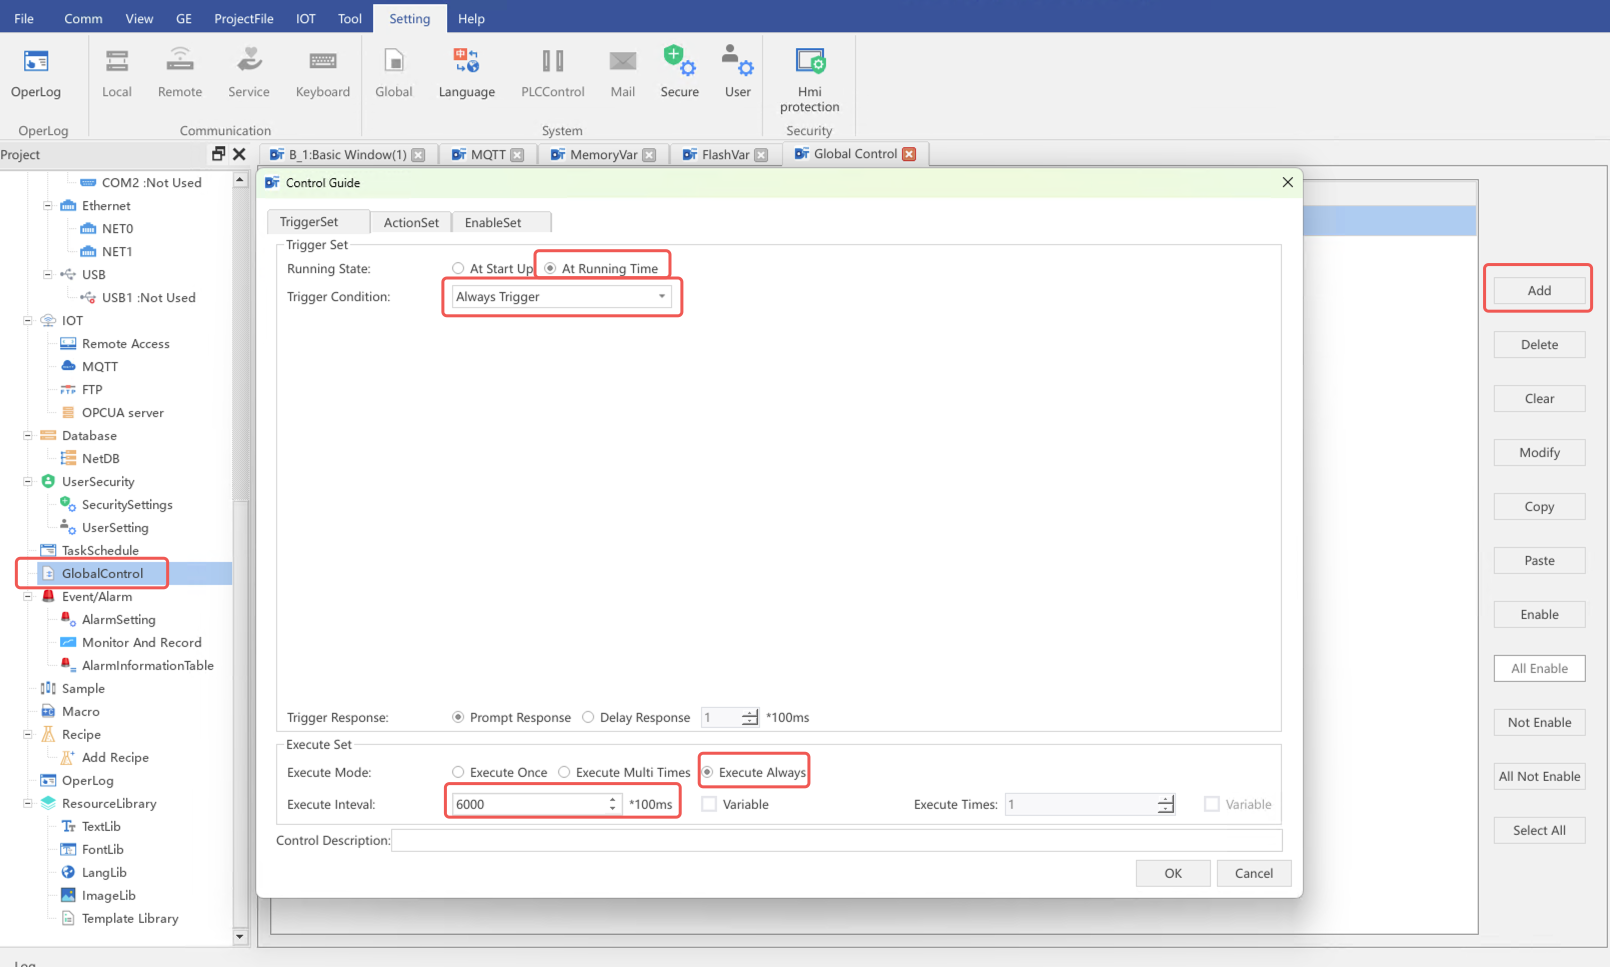
Global Control, add a new control
- Trigger Settings
- Running status:When running
- Trigger condition:Always trigger
- Execution mode:Always execute
- Execution interval:6000 * 100 milliseconds = 10 minutes (the platform receives data at most once per minute)
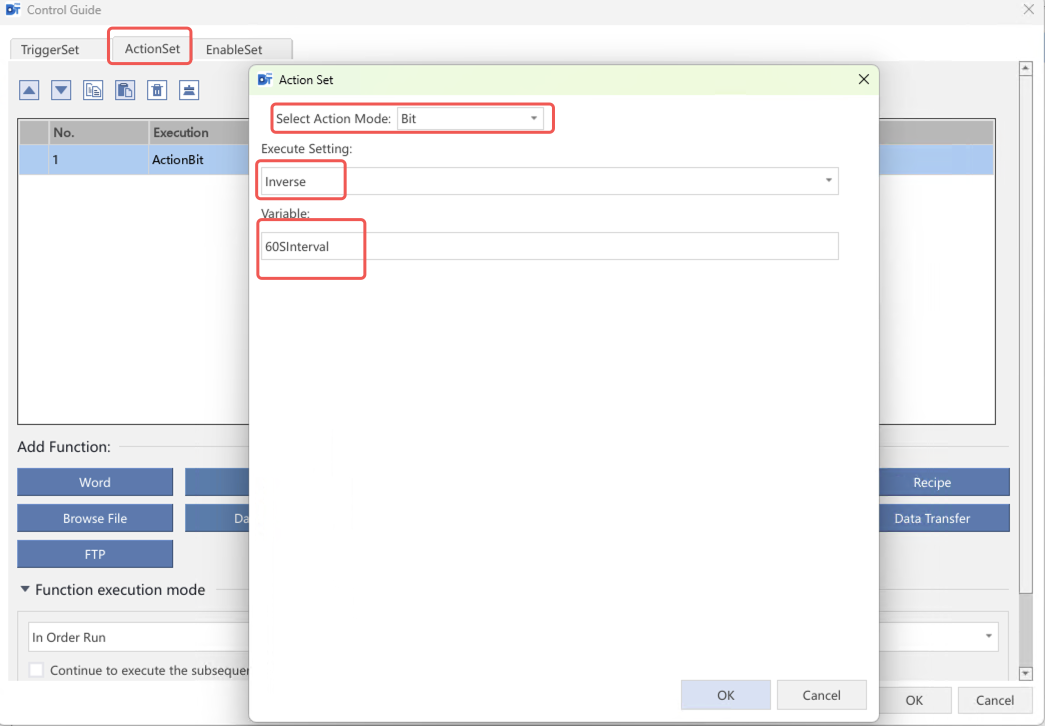
- Action setting
- Operation mode:bit
- Execute setting:invert
- Variable:selects the new
memory variableabove
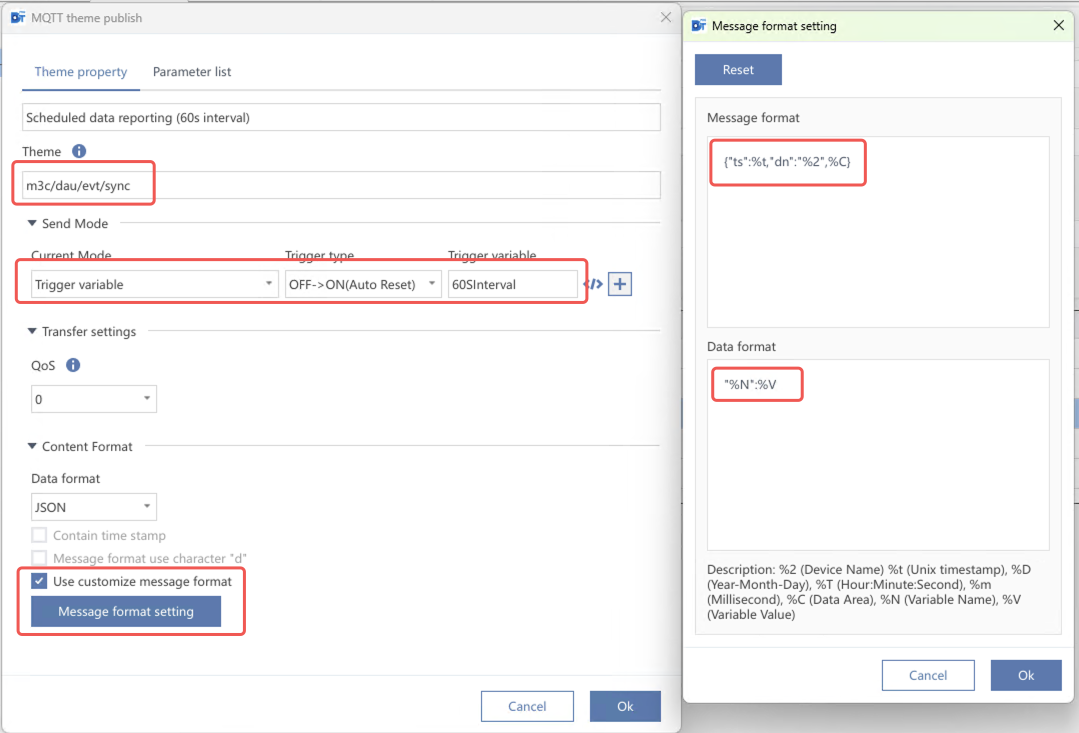
- Topic Properties
- Topic:
m3c/dau/evt/sync - Send mode: Trigger variable
- Trigger mode:
Off->On (auto recovery) - Trigger variable:The
memory variablecreated in the above steps
- Trigger mode:
- Content format: Custom message format
- Message format:
{"ts":%t,"dn":"%2",%C} - Data format:
"%N":%V
- Message format:
- Topic:
- parameter list
- All parameters to be reported
7. Fault Reporting
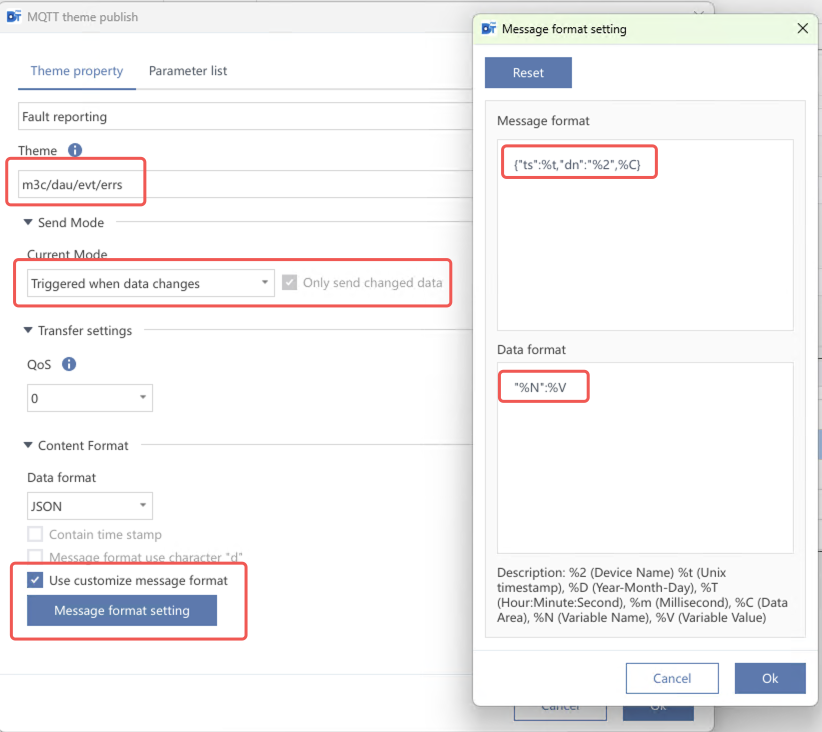
- Topic Properties
- Topic:
m3c/dau/evt/errs - Send mode: Triggered when data changes
- Content format: Custom message format
- Message format:
{"ts":%t,"dn":"%2",%C} - Data format:
"%N":%V
- Message format:
- Topic:

- parameter list
- The data type of the fault parameter is
bit
- The data type of the fault parameter is
8. Device parameter send
The device parameters are sended in the following steps:
- The device subscribes to the message, the platform sends a response message, and the device receives the message
- After receiving the message, the device sends a confirmation message to the platform.
- The platform receives the message and confirms that the send task is completed.
8.1 Device subscription
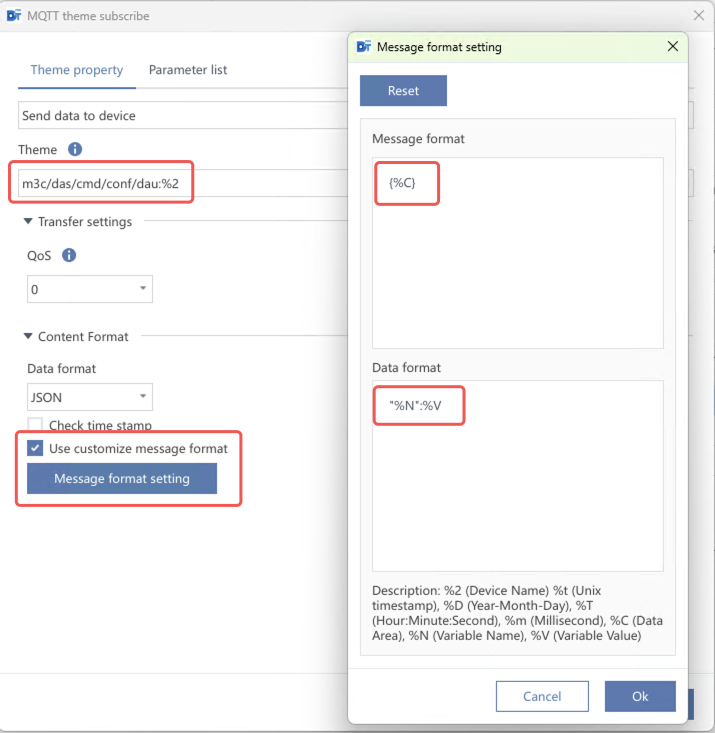
MQTT topic subscription- Topic Properties
- topic:
m3c/das/cmd/conf/dau:%2 - Content format: Custom message format
- Message format:
{%C} - Data format:
"%N":%V
- Message format:
- topic:
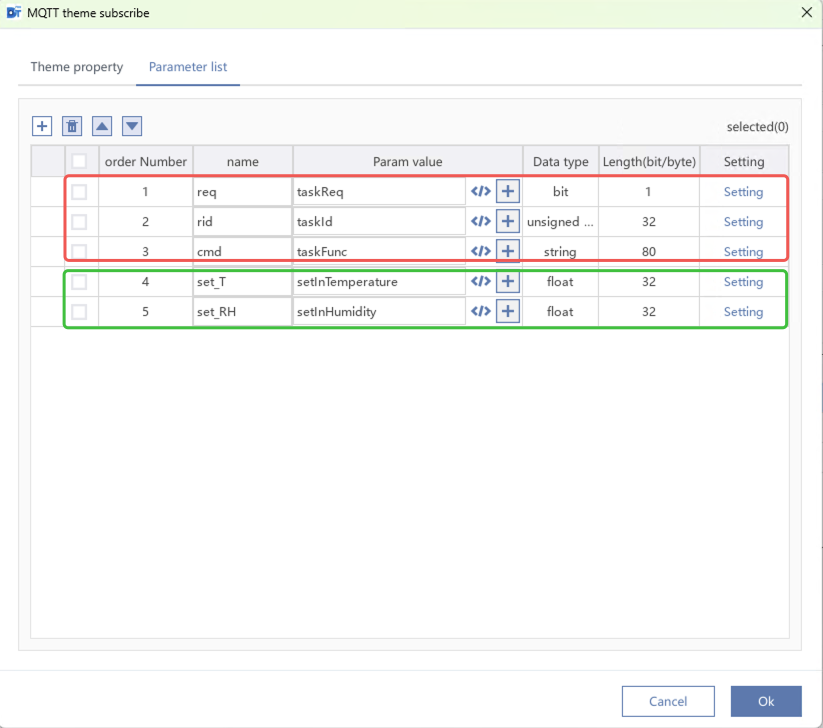
- Receive parameter list
- System parameters (fixed parameters, must exist)
-
- Trigger sending confirmation message after subscription is received
- Name:
req - Data type:bit
- Memory variable, the default value is
0, the fixed value sent by the platform is1, after receiving data,0->1, triggering the sending of a confirmation message, after the confirmation message is sent, the value is reset to0
-
- The platform send the task number
- Name:
rid - Data type:32-bit unsigned number
- When sending a confirmation message, this parameter needs to be sent to the platform with its original value
-
- The platform sent the task ID
- Name:
cmd - Data Type: String
- When sending a confirmation message, this parameter needs to be sent to the platform with its original value
-
- Custom parameters
- Received parameters, which must originate from the `device control parameter upload'
- System parameters (fixed parameters, must exist)
8.2 Notification of Successful Subscription
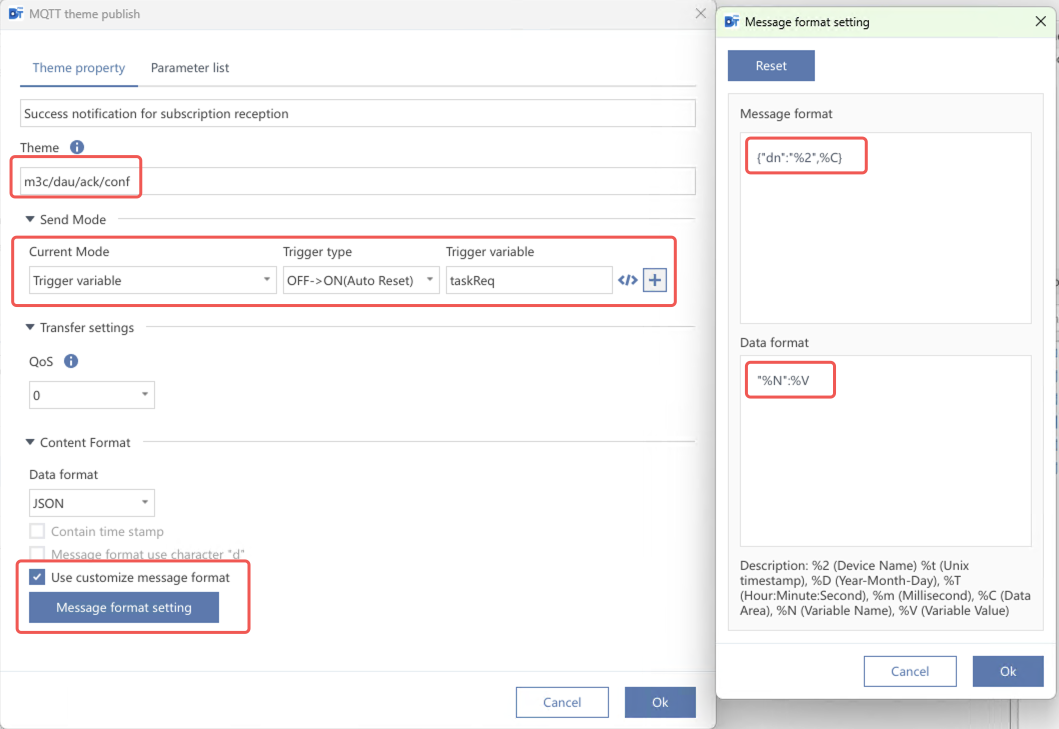
MQTT topic publish- Topic Properties
- Topic:
m3c/dau/ack/conf - Send mode: Trigger variable
- Trigger mode:
Off->On (auto recovery) - Trigger variable:
Subscribe to the received system parameter req
- Trigger mode:
- Content format: Custom message format
- Message format:
{"dn":"%2",%C} - Data format:
"%N":%V
- Message format:
- Topic:
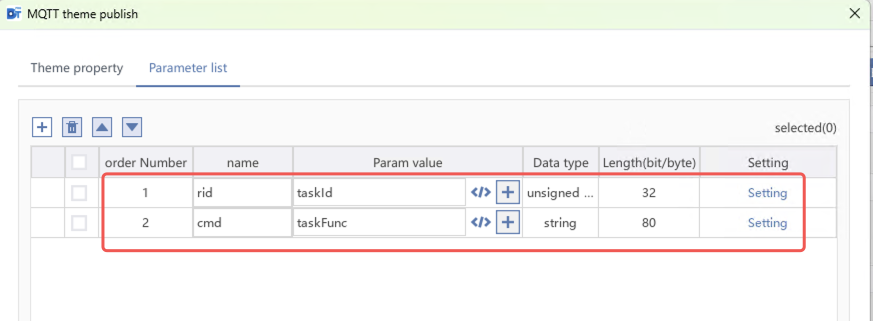
- Parameter list (fixed 2 parameters)
- Subscription task ID
- Name:
rid - Data type:32-bit unsigned number
Subscribe to the received system parameter rid(need to send the content sent by the platform back to the platform)
- Name:
- Subscription method identifier
- Name:
cmd - Data Type: String
Subscribe to the received system parameter cmd(need to send the content sent by the platform back to the platform)
- Name:
- Subscription task ID
9. Model import to cloud platform
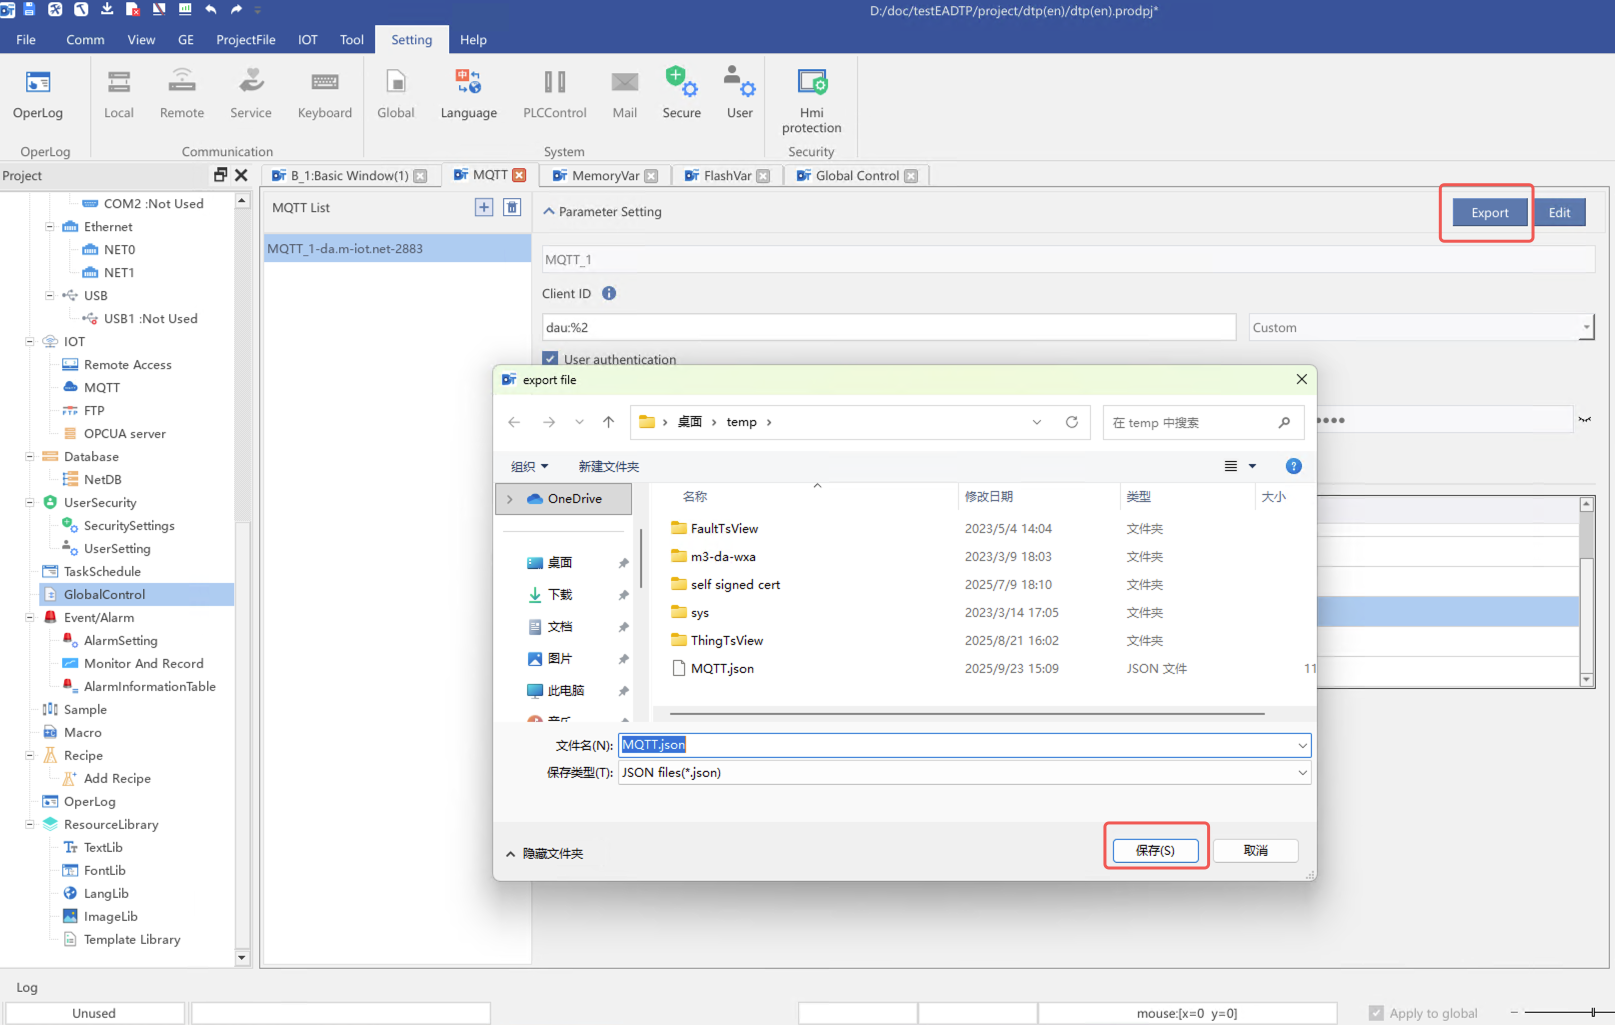
- Export the MQTT project configuration to local. The default file name is
MQTT.json
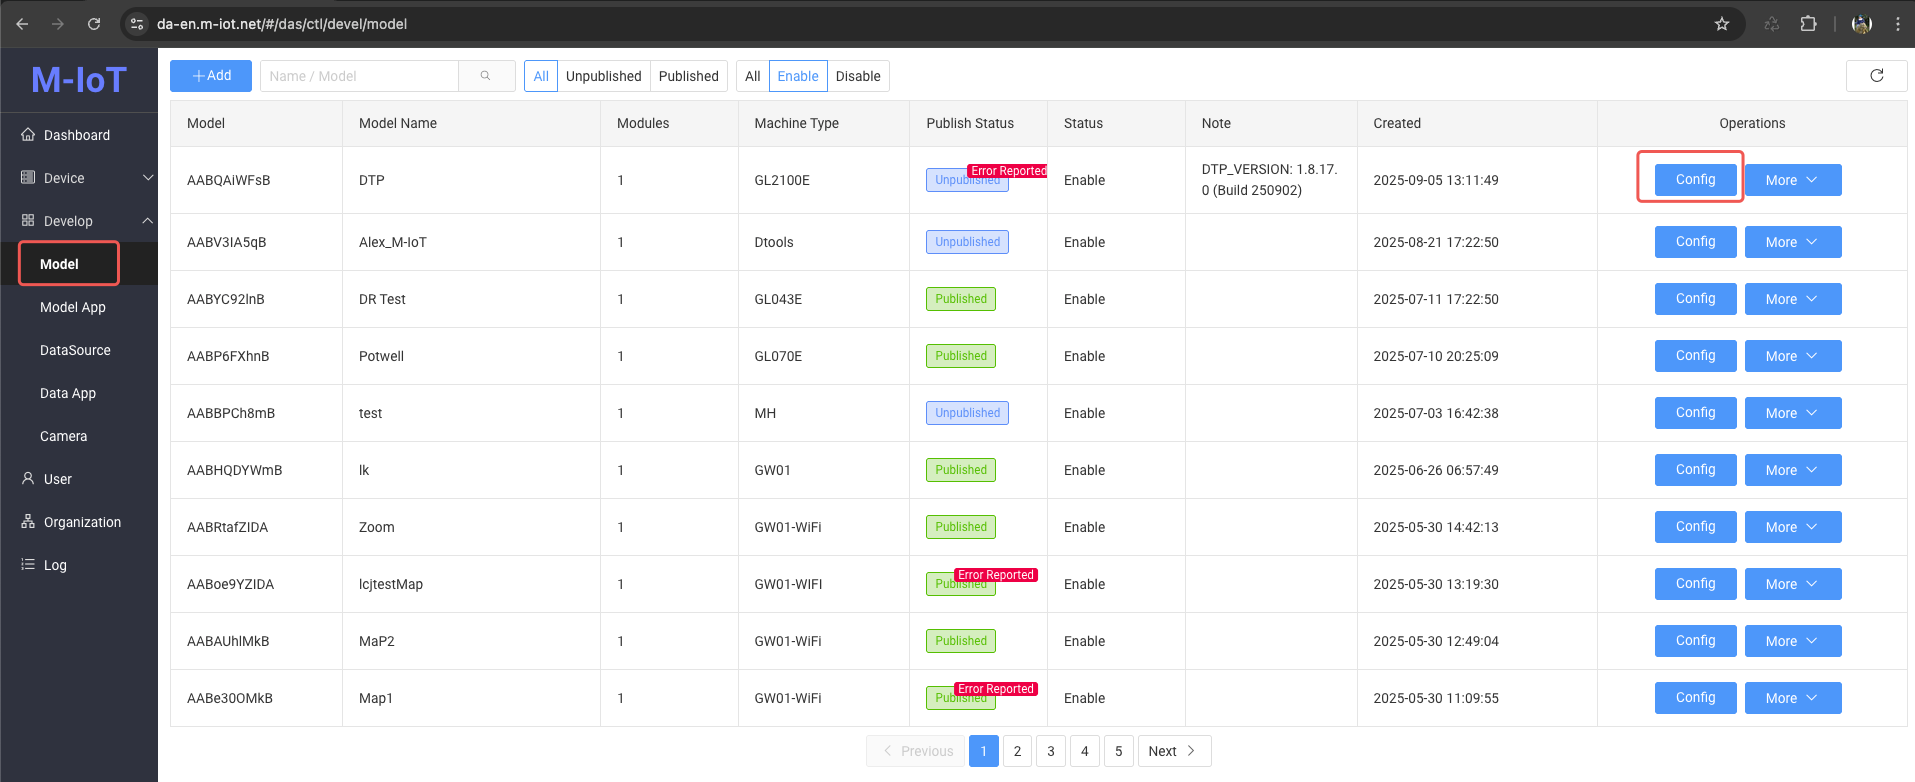
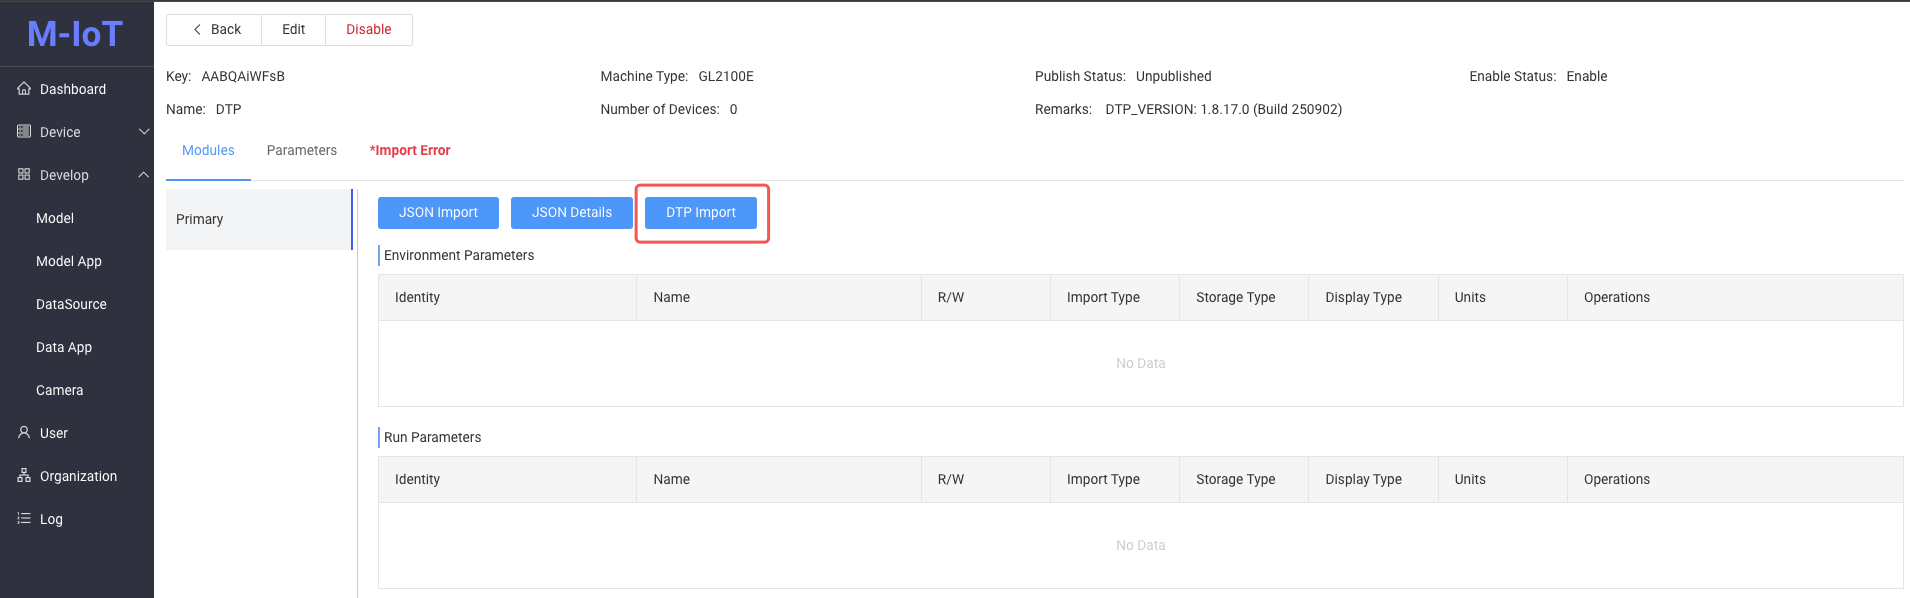
- Open the platform's model management page, in the model's
Configurationinformation, clickDTP Importto import theMQTT.jsonfile
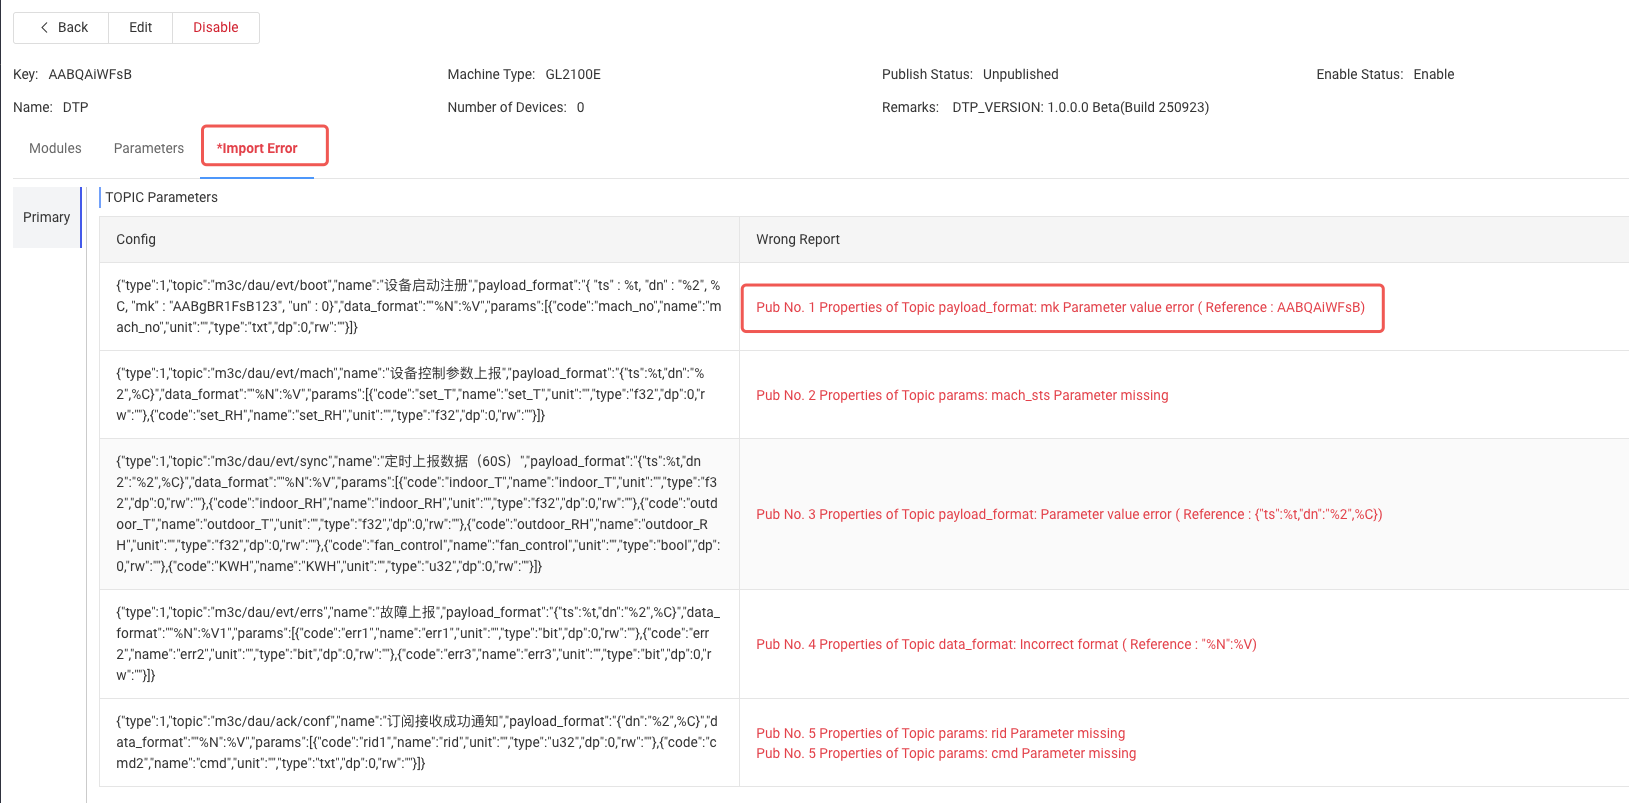
- If there is an error in the import, please refer to the error message, modify the MQTT related settings of the project, and then re-export and re-import
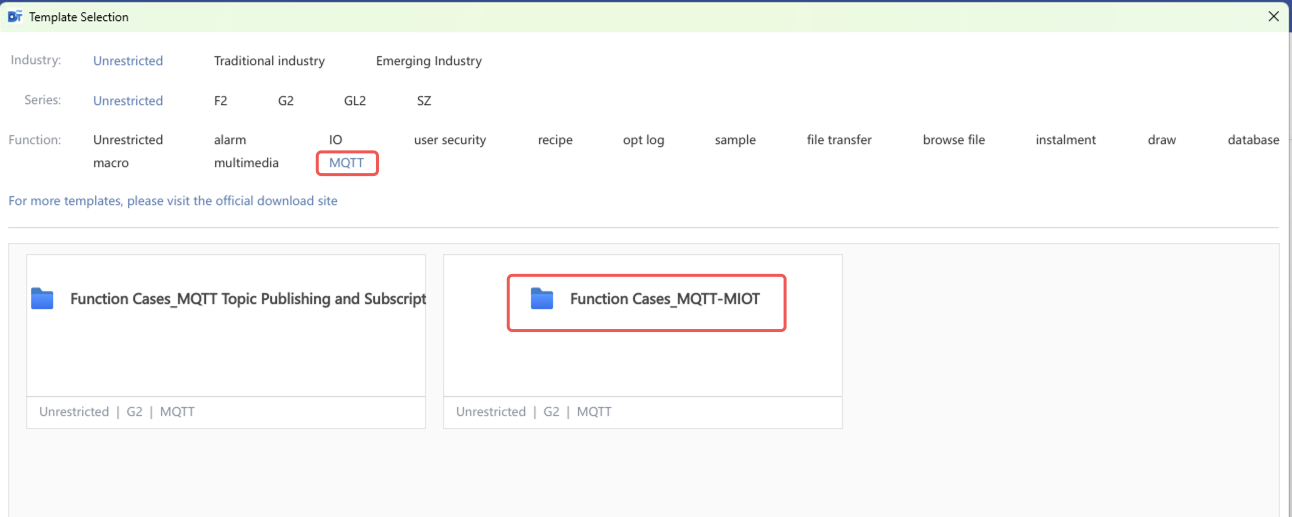
10. Sample project
Template projects exist within the DTP tool