Application Template Demo
1. Create Page
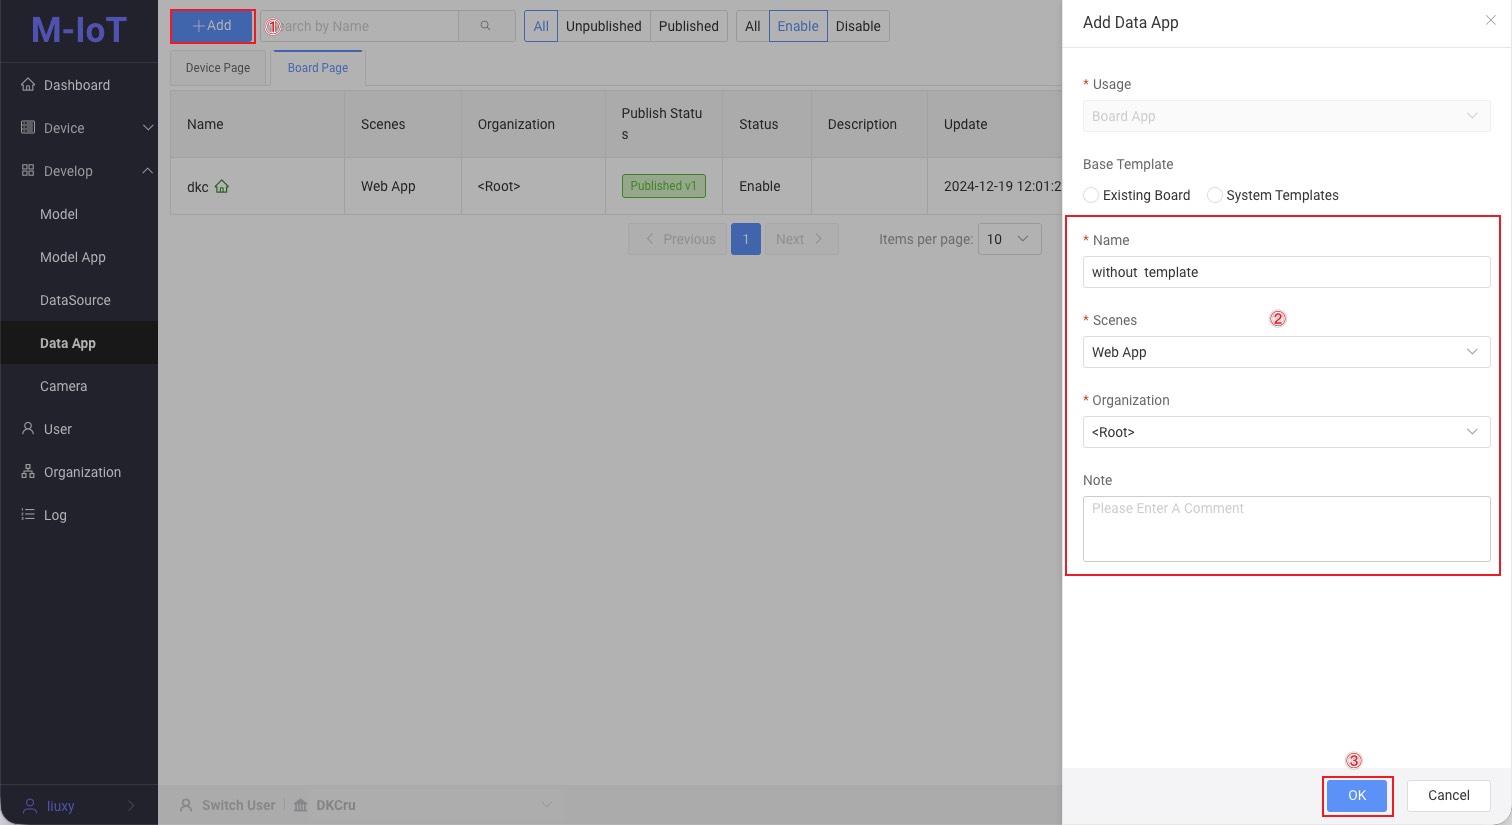
1.1 Creating Page Without Using Template
- Click the Add button
- Fill in the board content
- Click the OK button
1.2 Creating Page Using Template
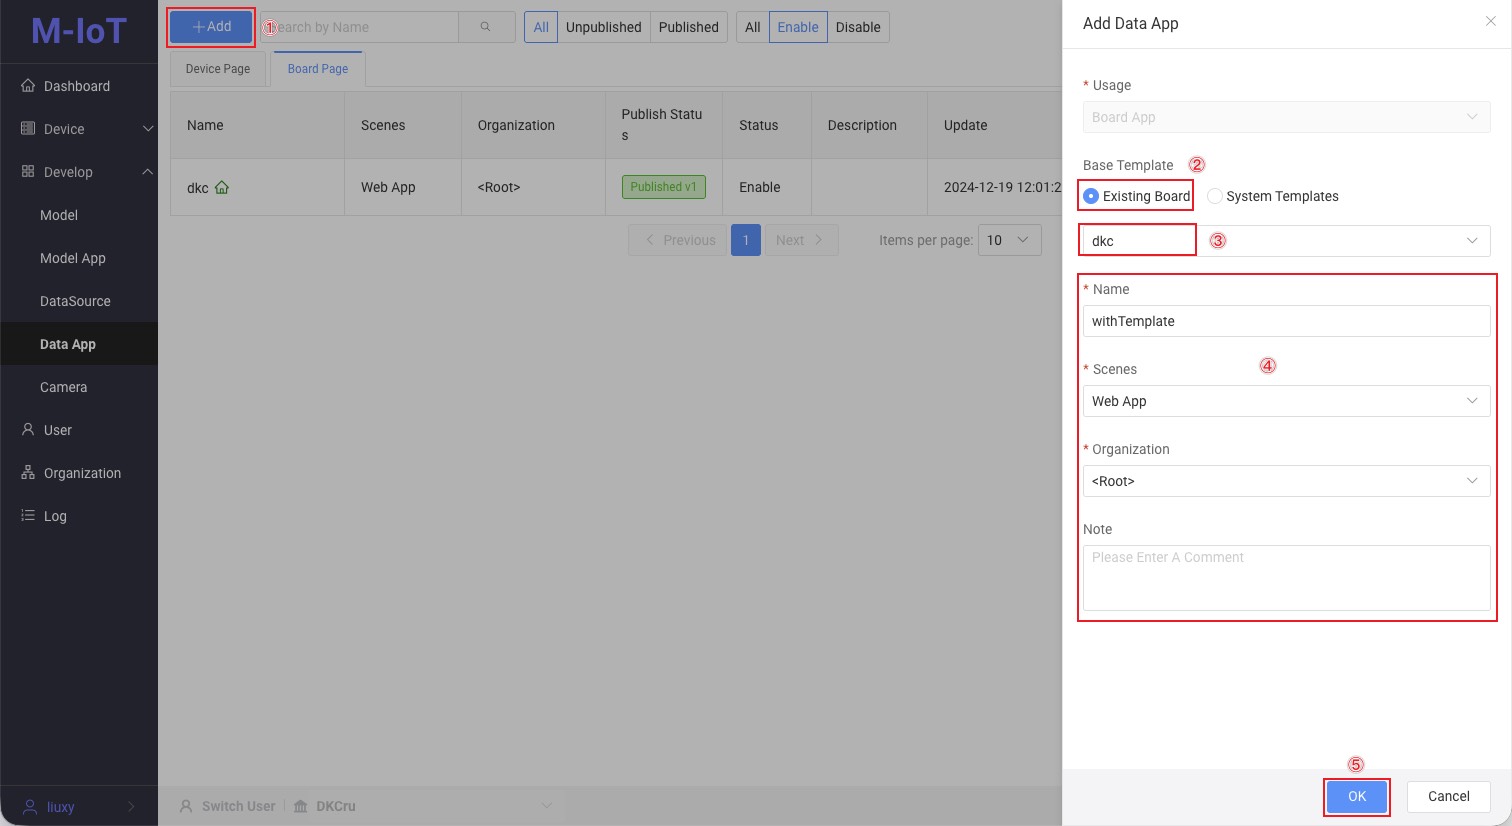
1.2.1 Using Other Boards as Templates to Create Pages
- Click the Add button
- Click the existing board option
- Choose another board as a template
- Fill in the board content
- Click the OK button
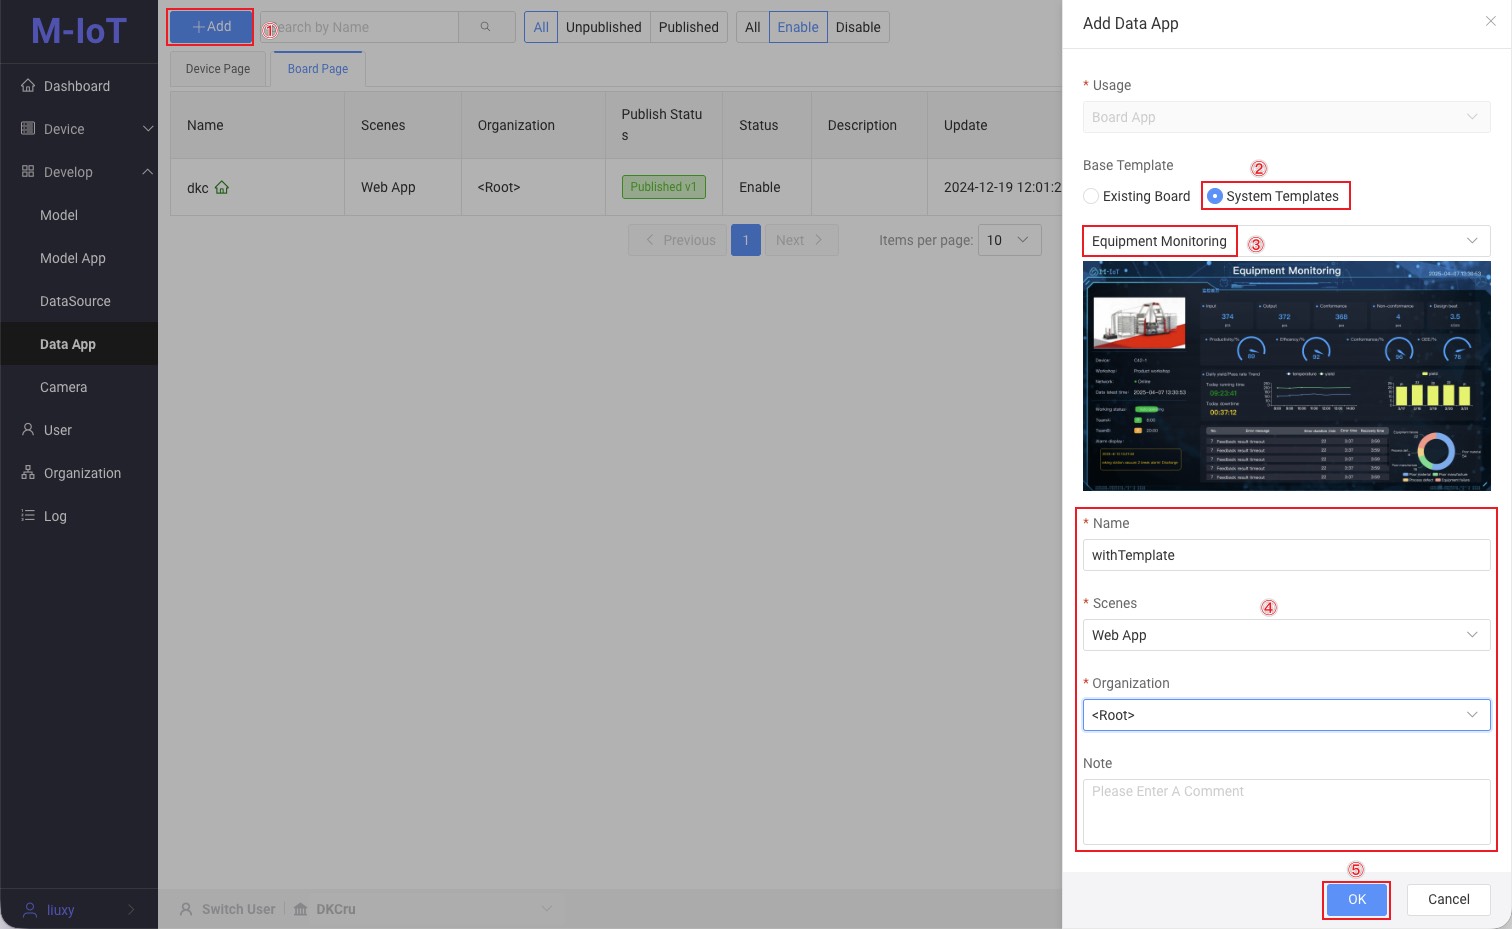
1.2.2 Creating Page Using System-provided Template
- Click the Add button
- Click the system option
- Select system template
- Fill in the board content
- Click the OK button
Enter the design page
- Click the "Design" button to enter the design page.

2. Import the Template into the Board.
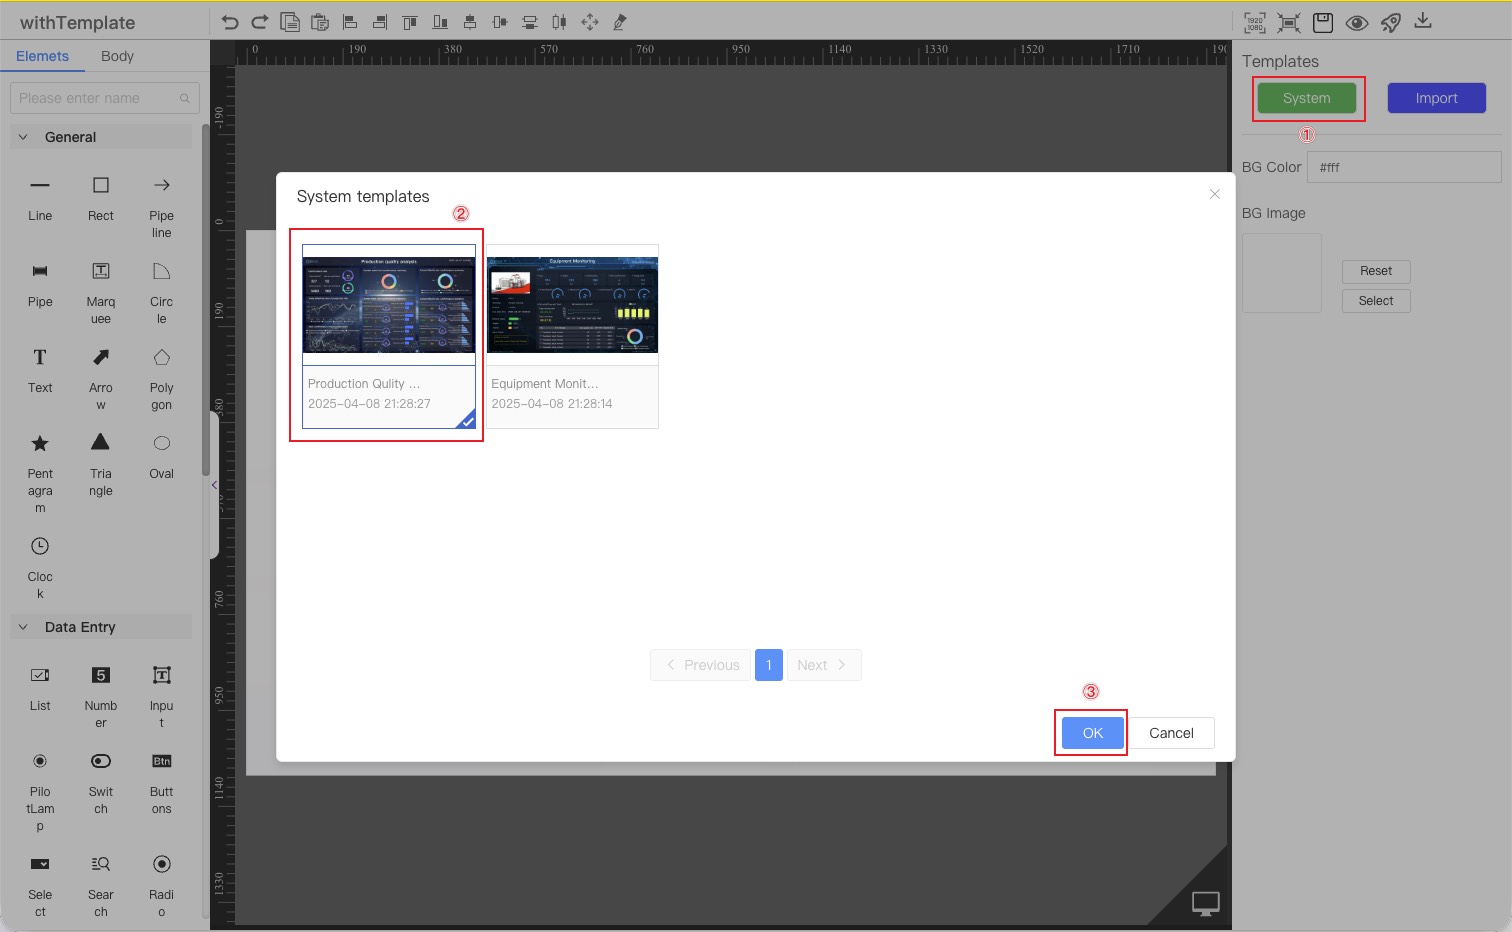
2.1 Application Templates Provided by the System
Select the template provided by the system.
- Click the System button in the template bar to open the system template library.
- Select the desired template
- Click the OK button
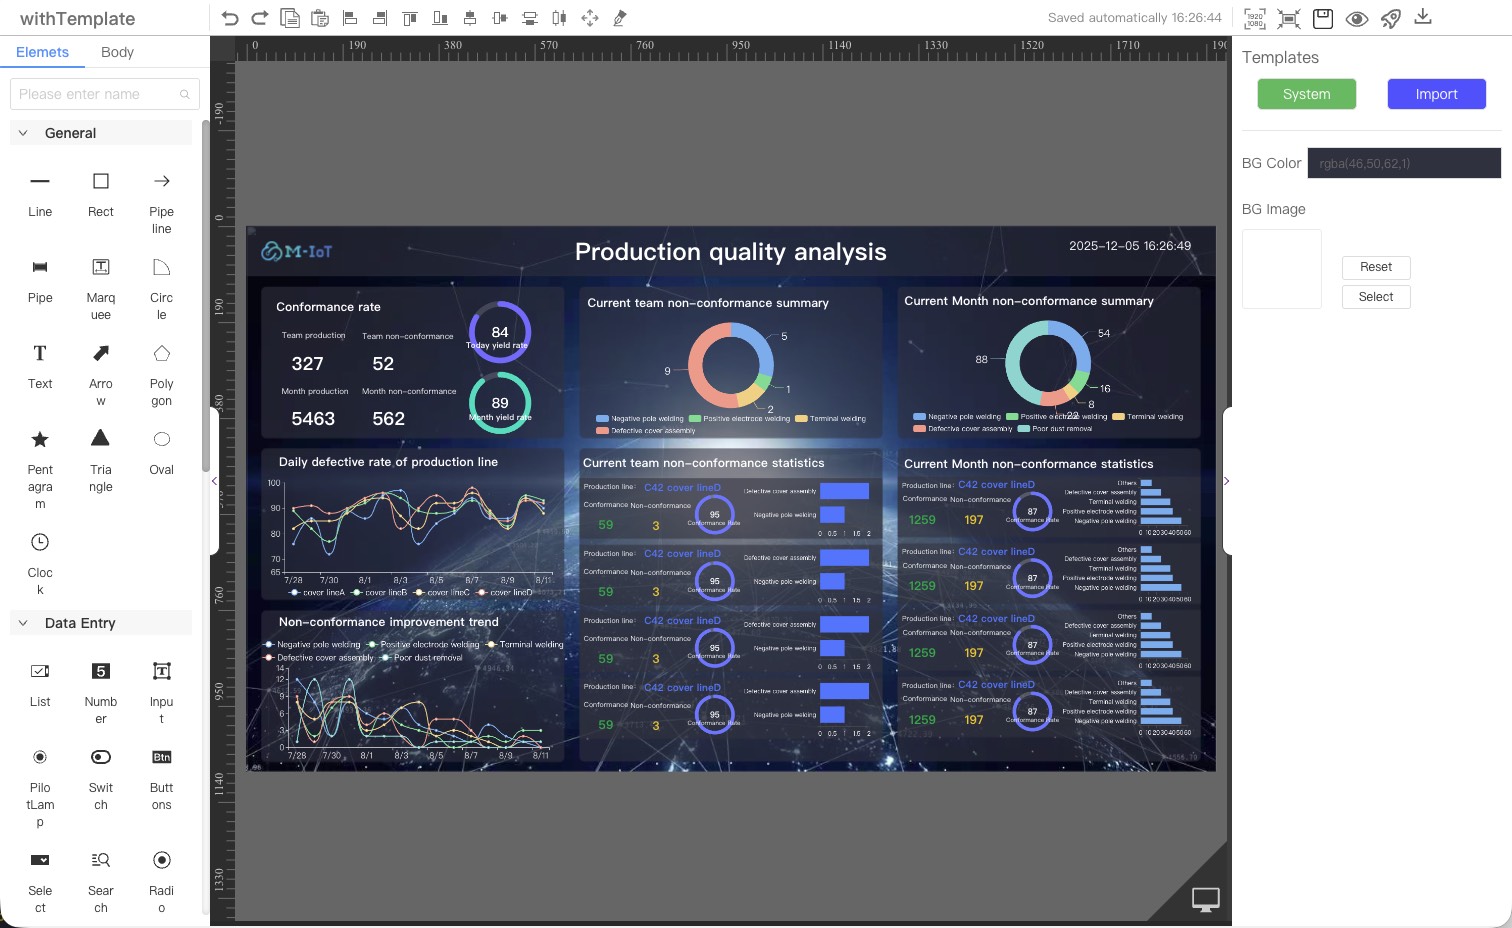
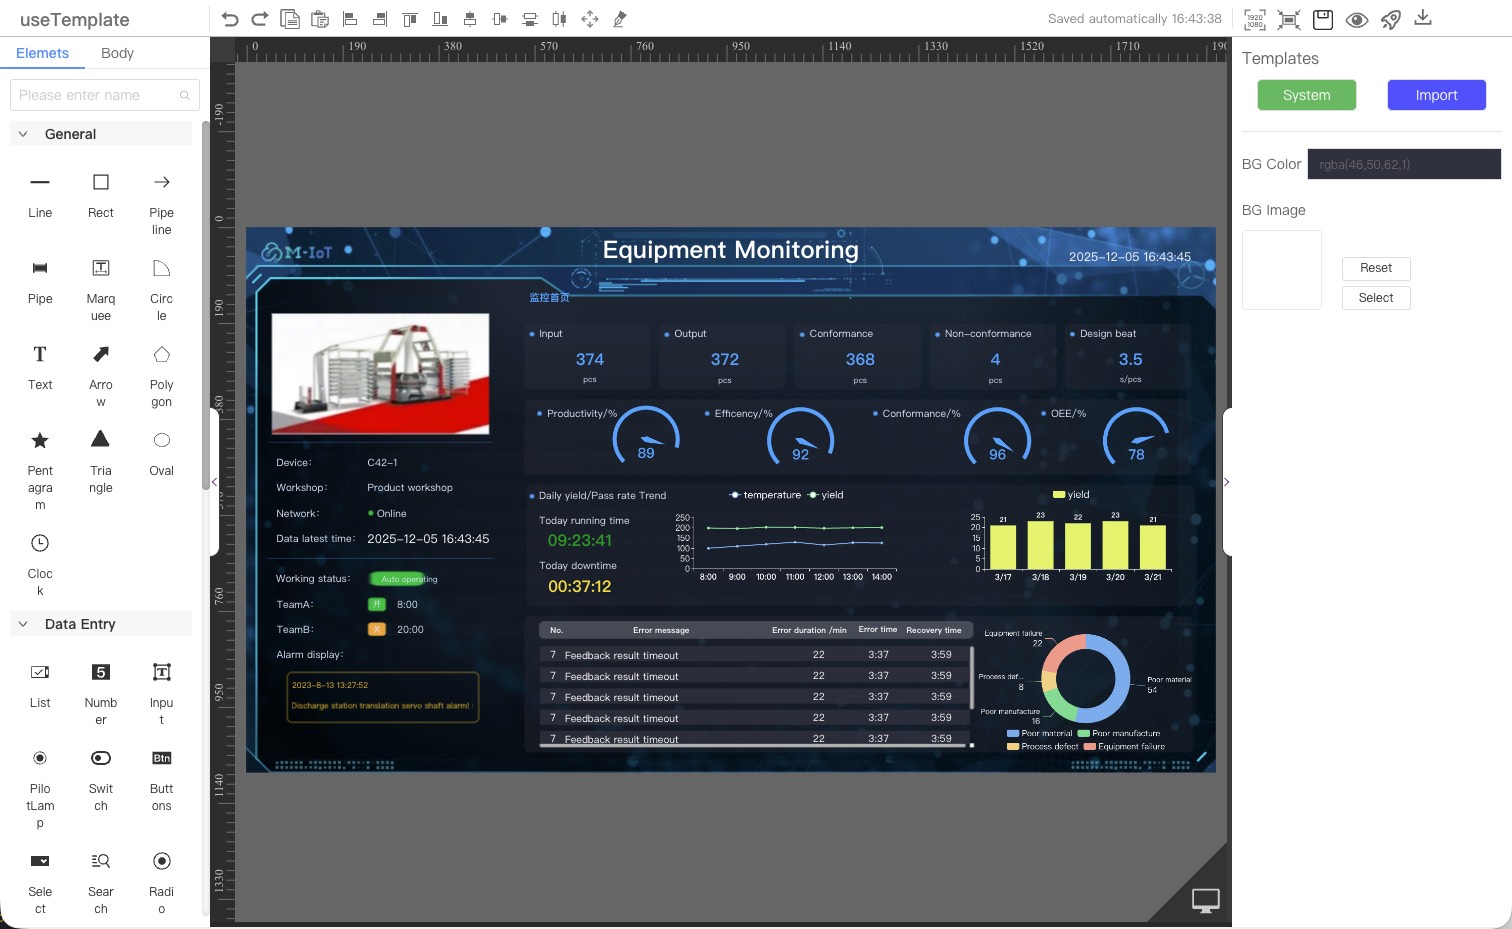
Template application complete
2.2 Use other Boards as Template
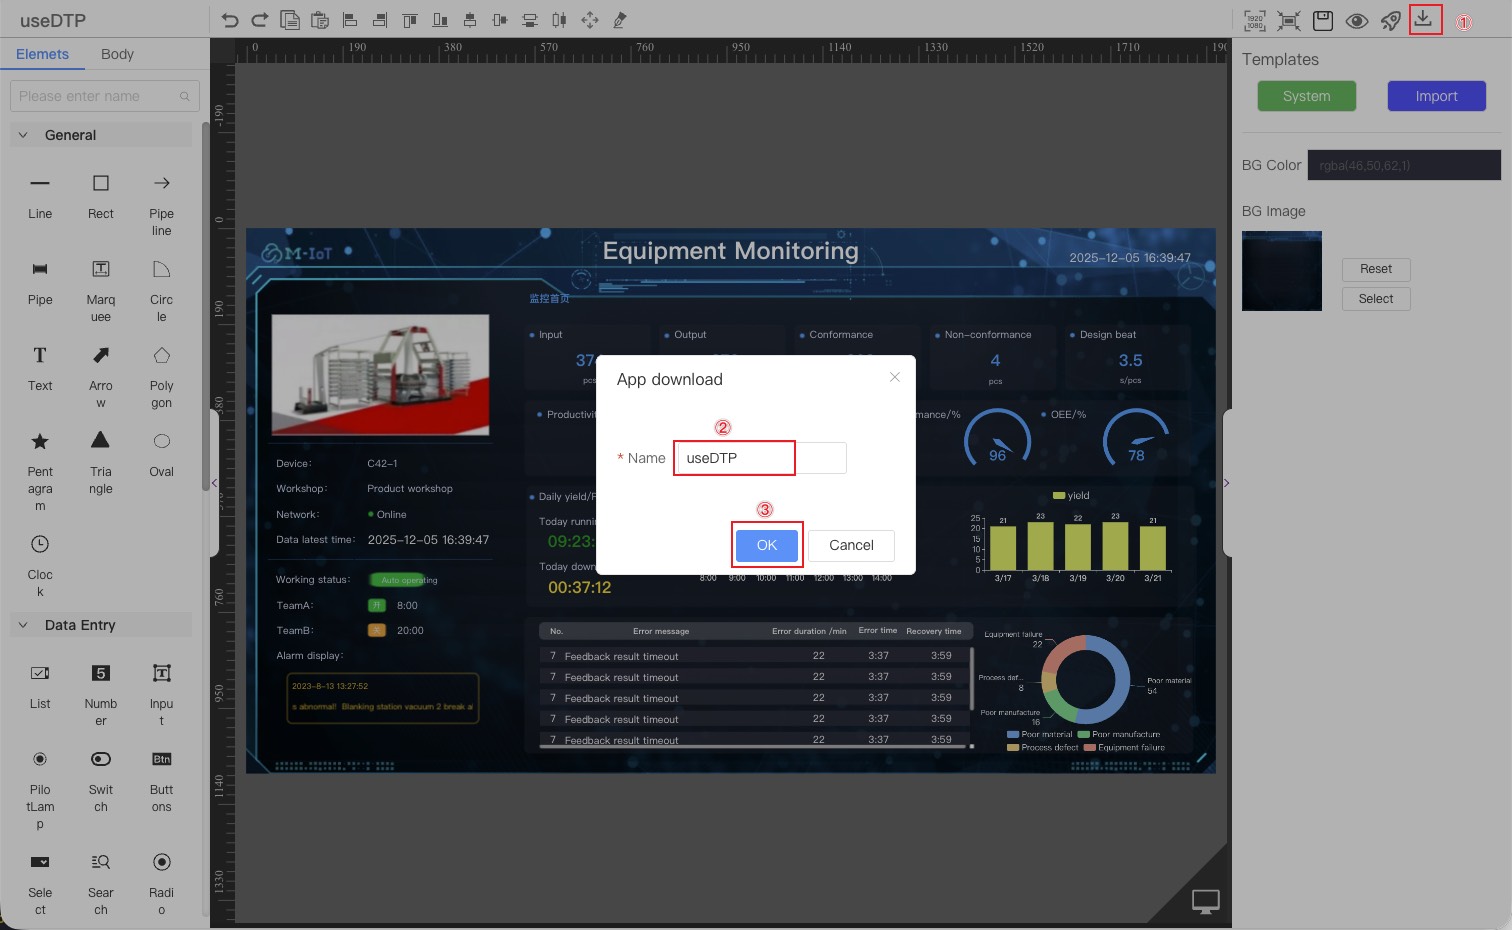
Download other boards
- Click the download button on other board pages
- Enter the name after downloading the board.
- Click the OK button
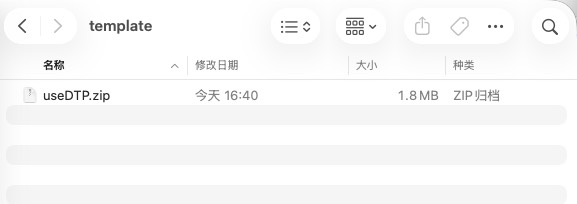
Other board have been downloaded.
Import downloaded boards
- Click the Import button in the template bar.
- Select the board you want to import.
- Click the OK button
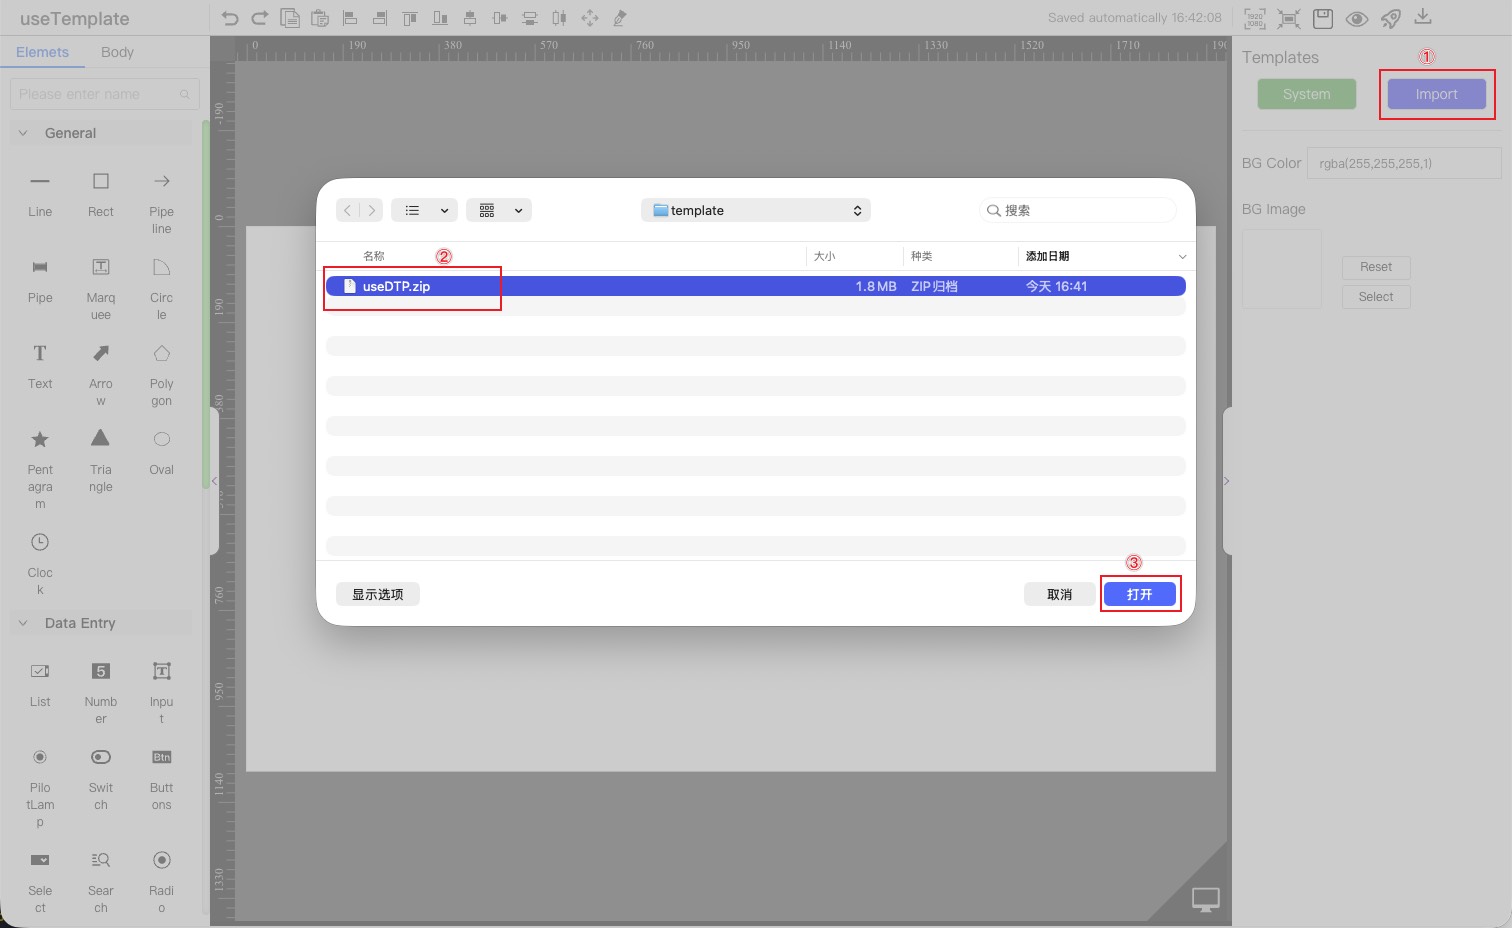
Importing other board complete
3. Data Configuration
Configure the corresponding data source for the component.
For detailed configuration, please refer to Configure Data Source
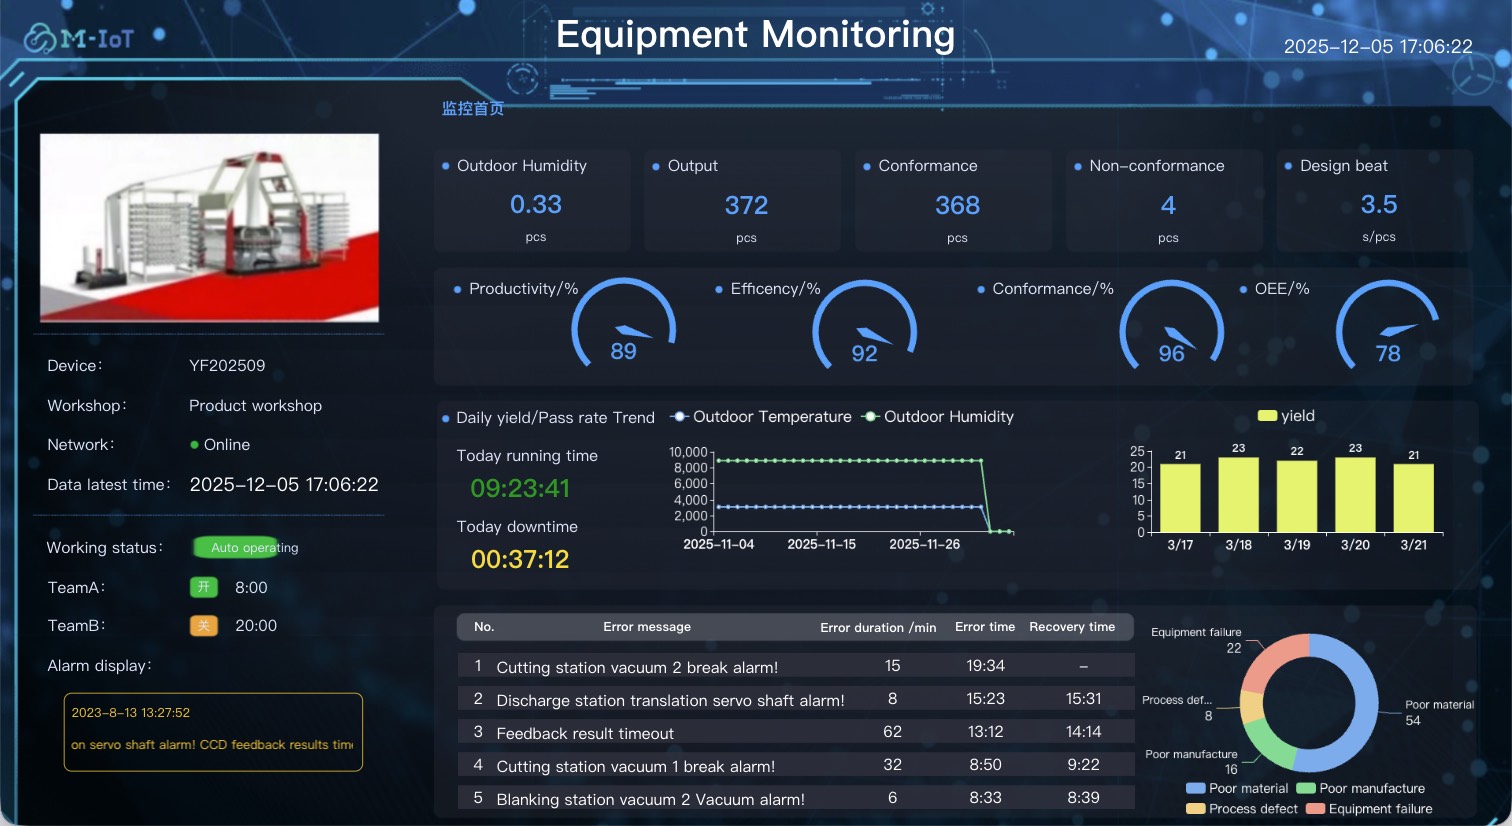
For configuration examples, please refer to Device Monitor and Statistics Case
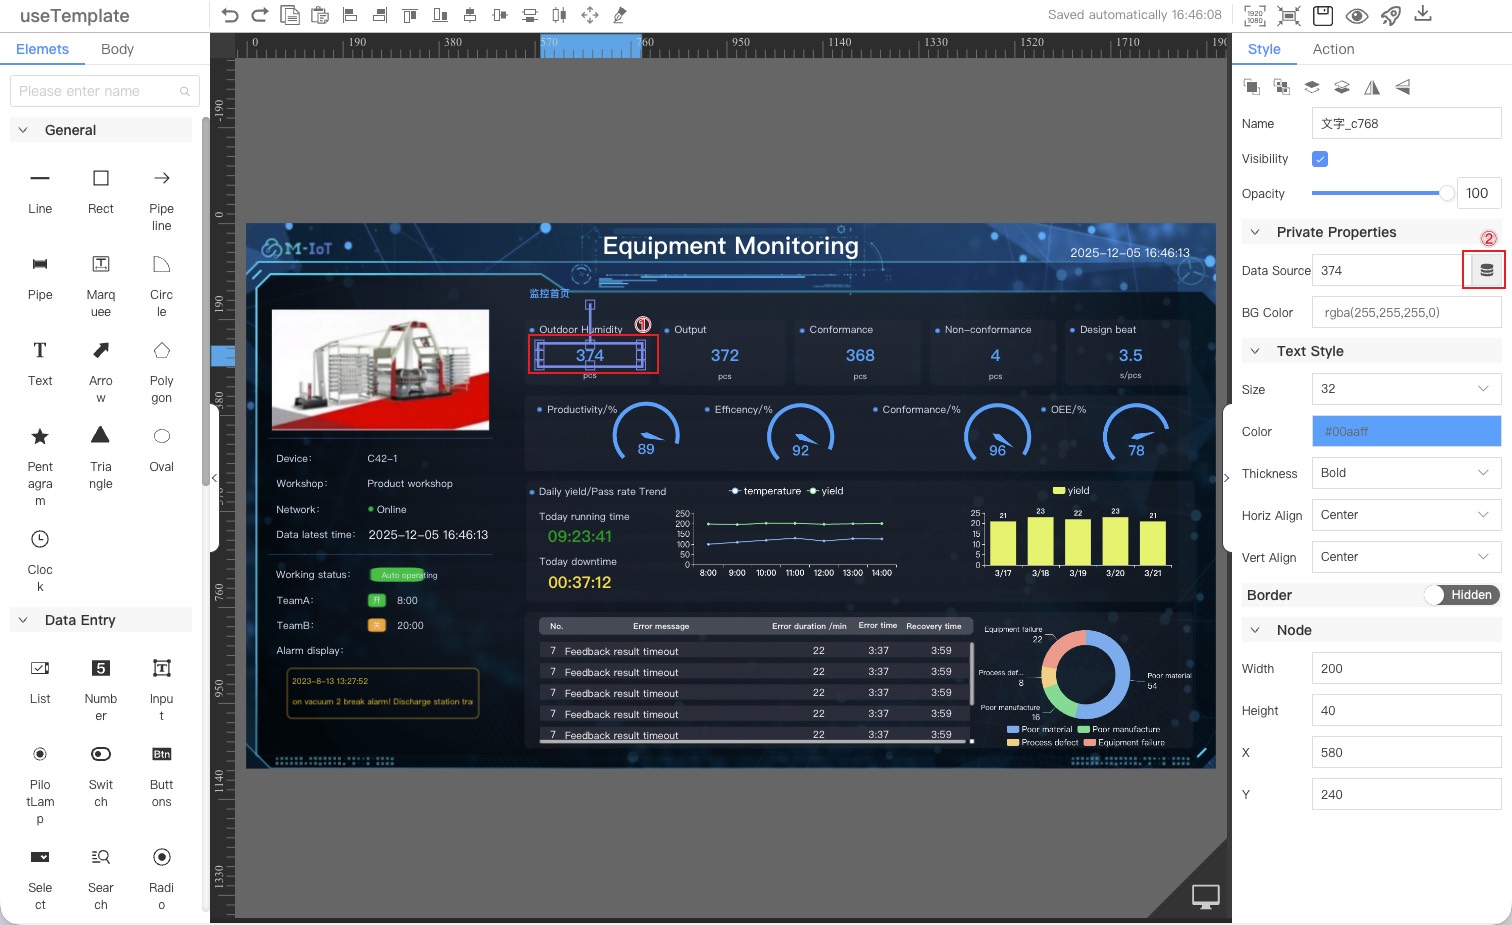
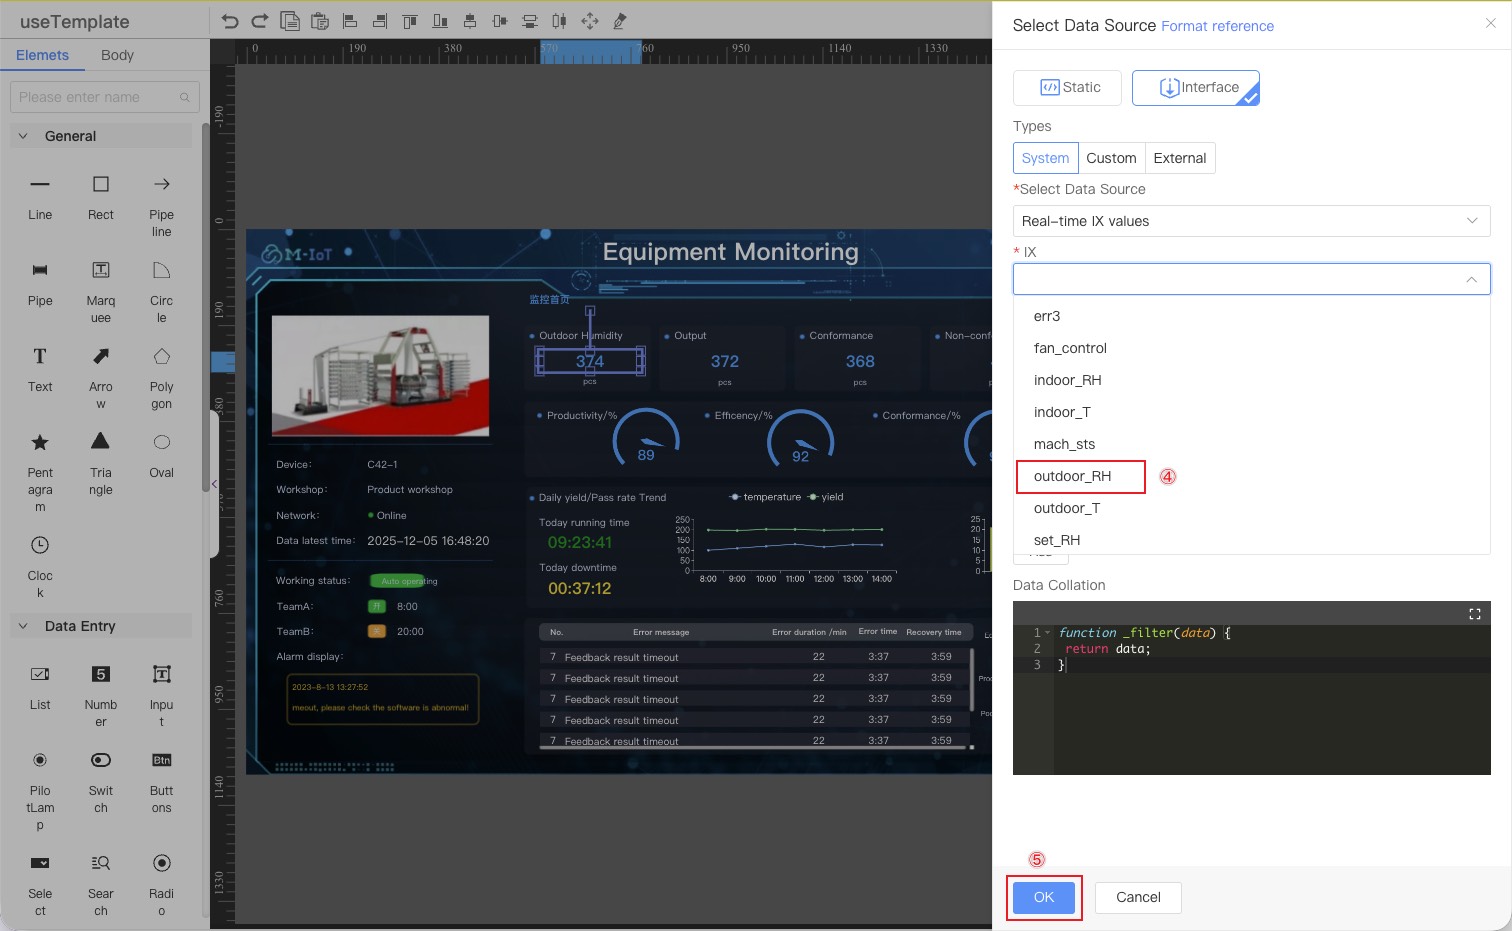
3.1 Configure Real-time Data
Taking outdoor humidity as an example
- Select the component to be configured
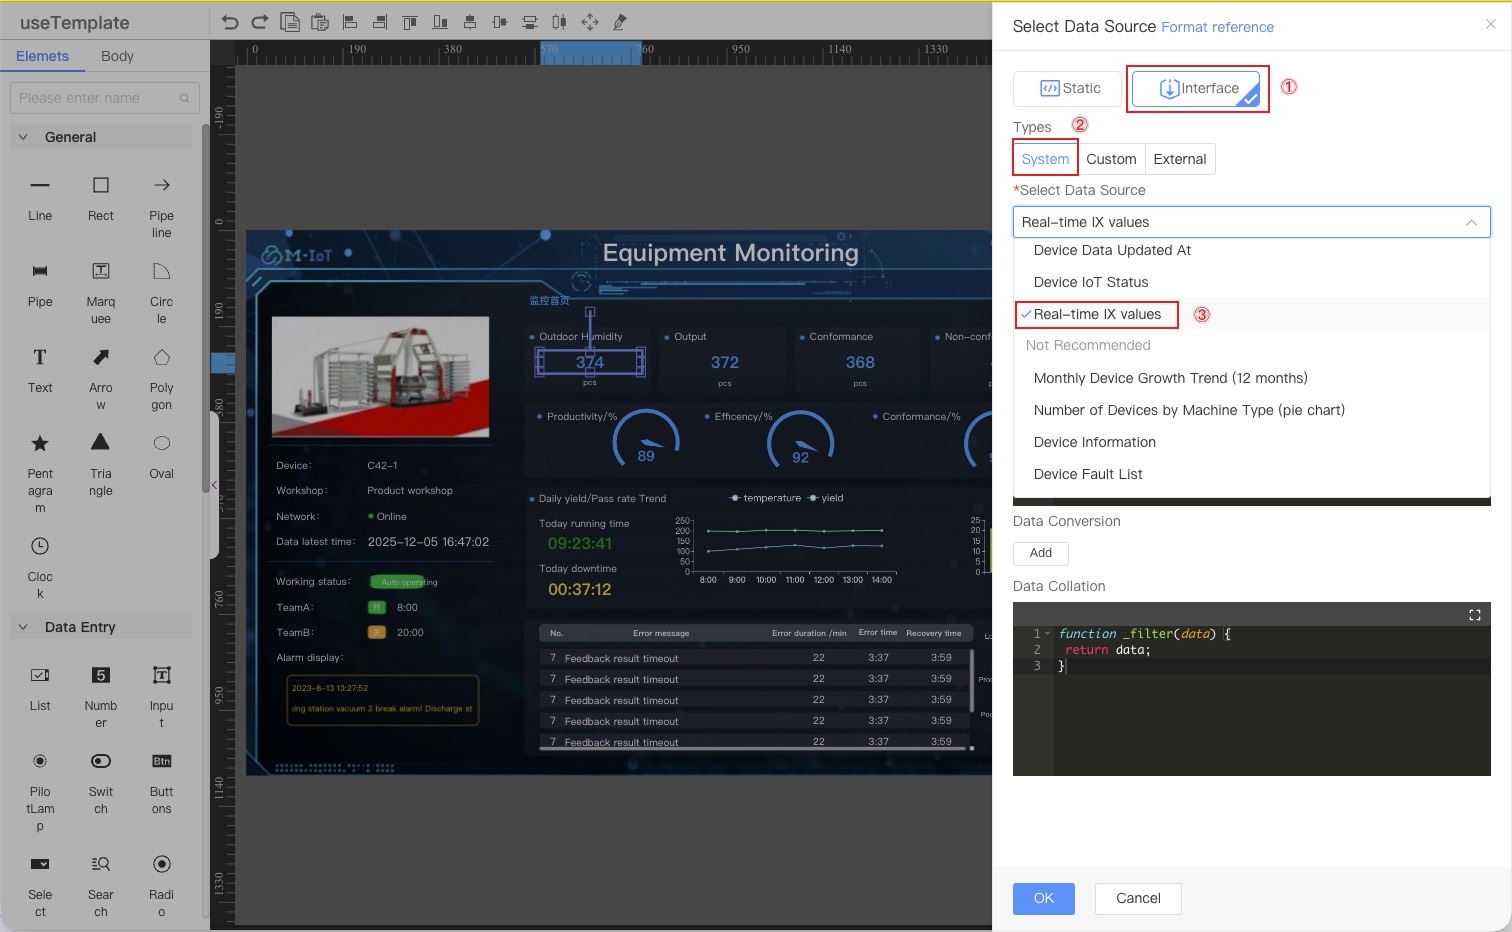
- Click the data source icon to open the data source configuration window.
- Select the interface data source
- Select the system type
- Select data source [Real-time IX values]
- Select the device IX [outdoor_RH]
- Click the OK button
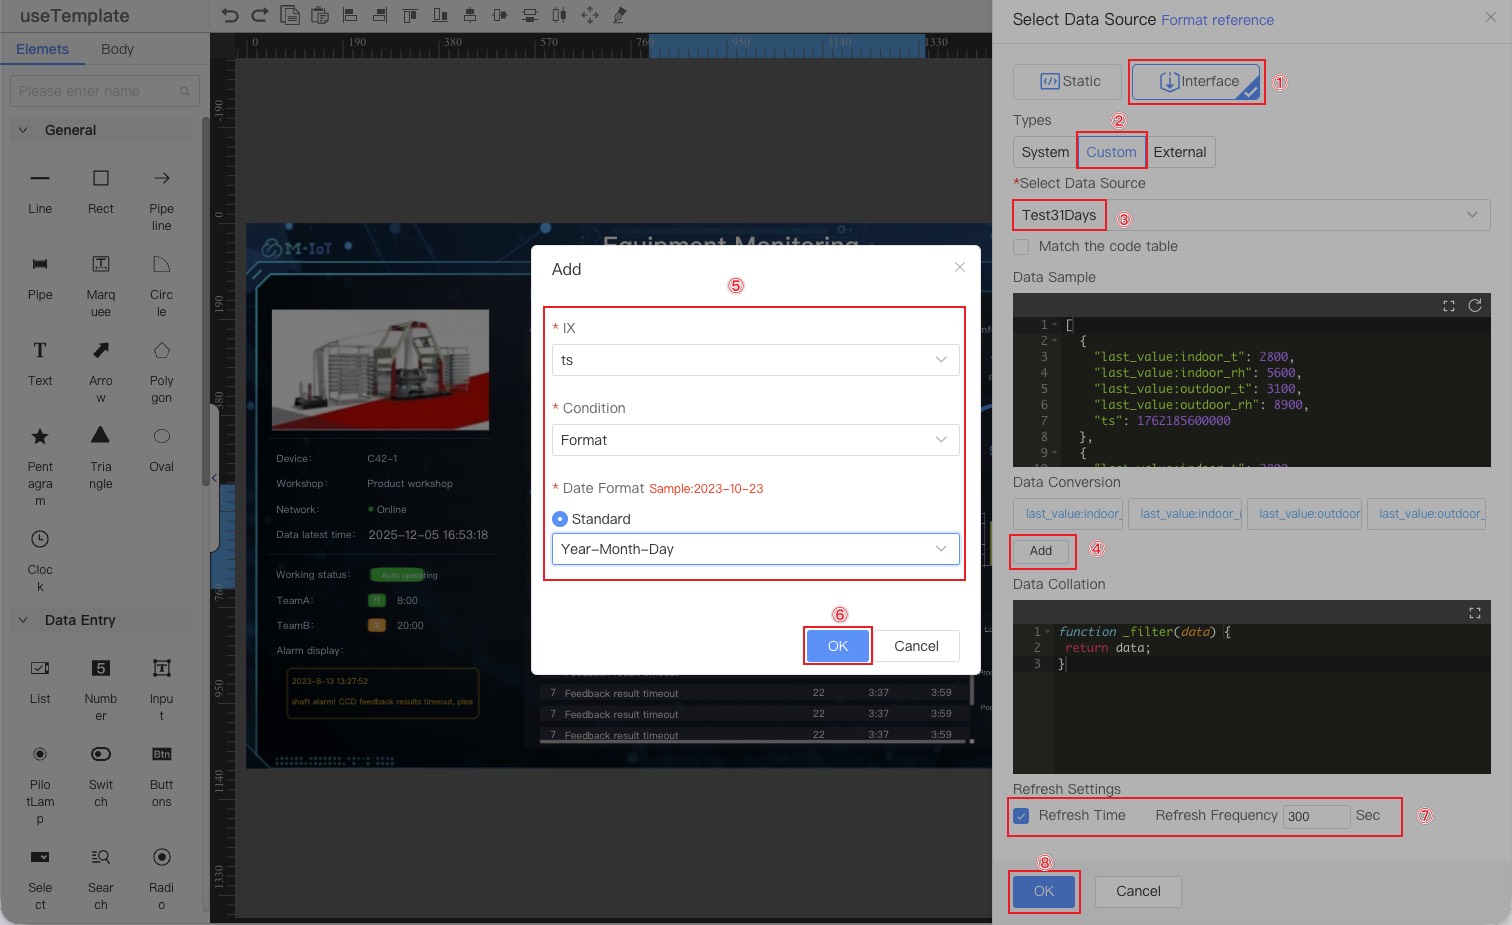
3.2 Configure Resume Data
Taking outdoor humidity line graph as an example
- Select the component to be configured
- Click the data source icon to open the data source configuration window.

- Select the interface data source
- Select the Custom Type
- Select data source [Test31Days]
- Click the "Add" button to open the data conversion configuration window.
- Fill in the conversion indicators and conversion methods.
- Click the OK button
- Select the data refresh frequency and enter the frequency time.
- Click the OK button
- Configure the display of components
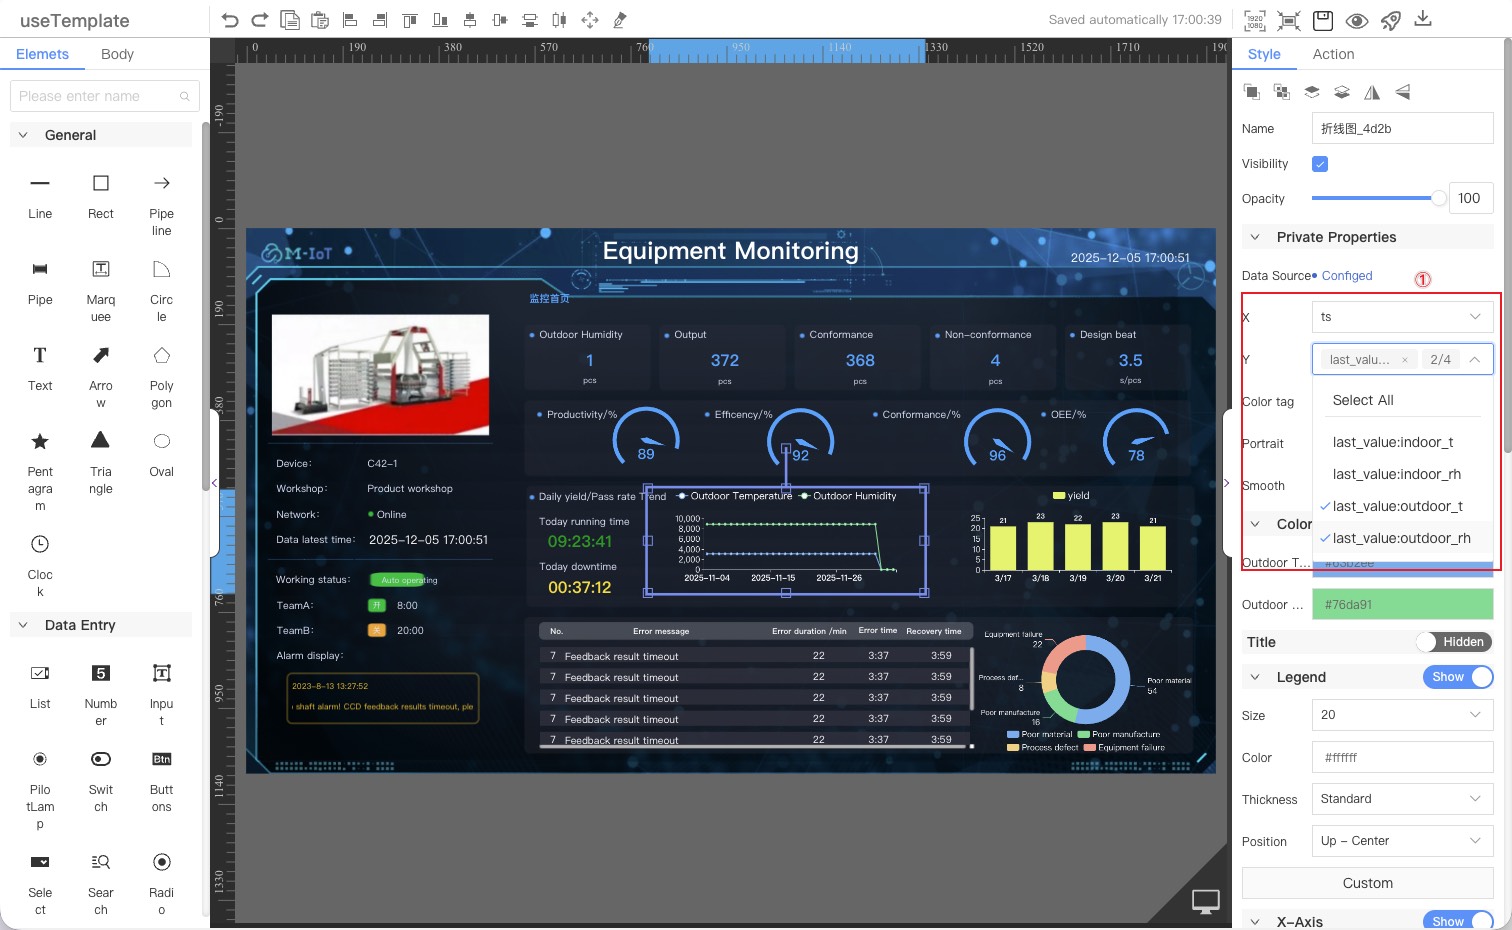
Final rendering